Adding Multiple Views to the Entity List for Dynamics 365 Portal

In our last blog we have learned how to display Dynamics 365 CE entity data on Dynamics 365 Portal using Entity List with a single Entity View “Active View”.
Now in this post we will see how to add more Views and change the caption of the views to the Entity List.
Open the Entity List and go to Views section and click on +View button to add one more view lets say “Inactive Contacts” and click on Save.

Lets test this by using the Power App Studio “Sync Configuration” and “Browse Website”. We can see the view picker at the top left corener of the List.

In the above screenshot we can see the 2 views as “Active Contacts” and “Inactive Contacts”. But sometimes it requires to change the caption for example from “Active Contacts” to “Recent Customers” and “Inactive Contacts” to “Retired Customers”. Lets see how to do that.
Open the View section on the Entity List and check the Advance checkbox.

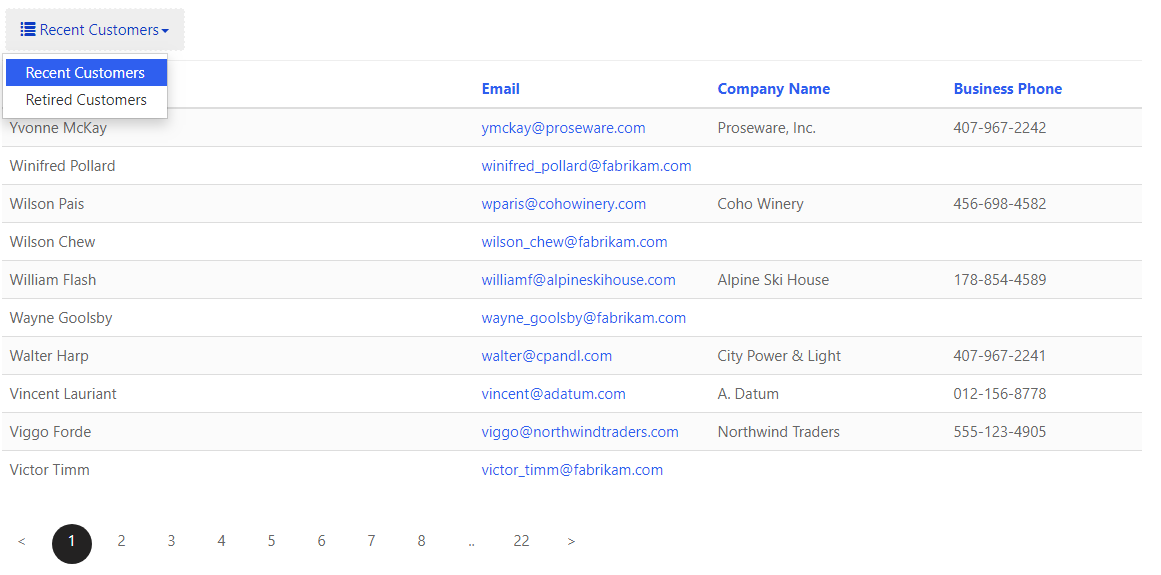
Once the Advance checkbox is checked, The Display Name option will be enabled for the Views. lets change the display name as “Recent Customers” for the “Active Contacts” and “Retired Customers” for the “Inactive Contacts” and Save it.

Now test this by using the Power App Studio “Sync Configuration” and “Browse Website”. We can see the view picker captions are changed as below screenshot.

In next article we will see how to add Search Box to List, Update Number of Pages count, Configure Empty List Text for the Entity List.


