Create Excel File in OneDrive Using Power Automate and Insert Records Dynamically from Dataverse

Exporting Dataverse records into Excel is a common requirement in Dynamics 365 and Power Platform projects—whether for reporting, backup, or data analysis. While Dataverse provides built-in export features, automating this process with Power Automate gives you flexibility, scheduling capabilities, and dynamic control over the Excel file.
In this blog, we’ll walk step-by-step through how to:
- Automatically create an Excel file in OneDrive
- Dynamically add a table to that Excel file
- Insert Dataverse records into that table—no manual formatting required!
Let’s begin.
To watch the video in action with Practical check here else scroll down to read the article.
Here is Step-by-step Power Automate to Create Excel File in OneDrive Using Power Automate and Insert Records Dynamically from Dataverse.
📌 Scenario
You want to automatically generate an Excel file daily, weekly, or on-demand, and populate it with records from a Dataverse table—e.g., Contacts, Accounts, Orders, or any custom table.
We’ll build a Power Automate flow that:
- Triggers manually or automatically
- Creates a new Excel file in OneDrive
- Adds a formatted table inside Excel
- Retrieves the required Dataverse records
- Loops and inserts rows into the Excel table
This solution works for all model-driven and canvas apps using Dataverse.
🛠 Prerequisites
✔ OneDrive for Business
✔ Power Automate Premium
✔ Dataverse access
✔ Excel for Web (optional for verification)
Step 1 : Define Trigger
Choose any trigger based on your requirement:
- Manual Trigger (for testing)
- Scheduled Flow (e.g., daily at 6 PM)
- When a row is added/modified (real-time sync)
For this guide, we’ll use Manual. Add a Text Input Parameter to capture File name from User.

Step 2 : Create File using OneDrive
Add the action:
➡ OneDrive → Create File
- Folder Path: Choose your destination (e.g.,
/Dataverse/) - File Name:
@{triggerBody()?['text']}.xlsx - File Content: Add a Space character to keep it blank. USE SPACE
This will generate a blank Excel file.

Step 3 : Step 3: Add a Table to the Excel File
Excel actions require a table, not a raw worksheet.
To create one dynamically:
➡ Excel Online (Business) → Add a Table
- Location: OneDrive for Business
- Document Library: OneDrive
- File : Provide the Folder Path and Dynamic File Name from Previous Step
- Table Rnge : A1:B1
- Table Name : allcontacts (as per your choice)
- Column names: name of columns comma separated e.g Firstname,Lastname

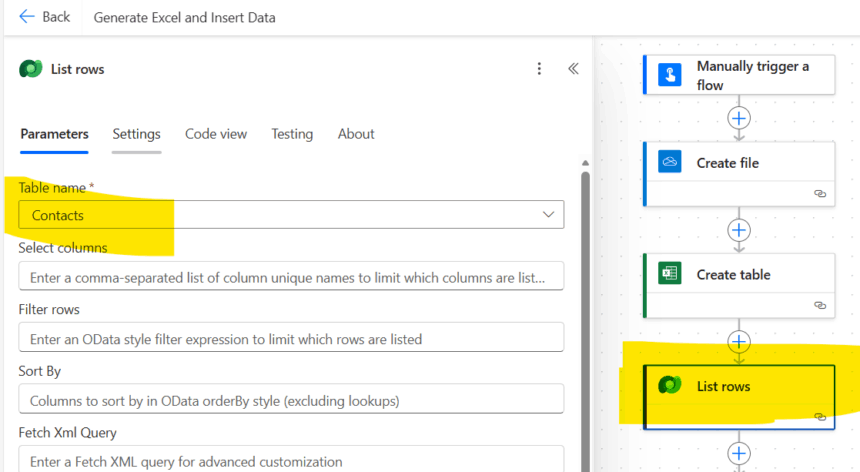
Step 4 : Get Records From Dataverse
➡ Dataverse → List Rows
Choose your table, e.g., Contacts.
Optional OData filters:
- Retrieve only active records:
statuscode eq 1 - Filter by date:
createdon gt 2024-01-01
Use Pagination if records exceed 5,000.
Step 5 : Loop Through Dataverse Records and Add Rows to Excel
Add a For Each loop:
➡ Excel Online (Business) → Add a Row Into a Table
Choose the same table created earlier.
Map fields:
| Excel Column | Dataverse Column |
|---|---|
| Firstname | firstname |
| Lastname | lastnamr |
| emailaddress1 |
You can map any custom fields.

Add Record.

Step 6: Save and Test
Run the flow.
✔ It will create a new Excel file
✔ Add a table with headers
✔ Insert rows dynamically from Dataverse
✔ Store the file in OneDrive for download, reporting, or automation
Hope It helps.