Create and Manage a Webpage, Add components, Change Navigation Menu for Portal in Dynamics 365 CE
In our last article we understand what is a Portal and how we can configure portals in Dynamics 365 instance. We can also create Portals in CDS environment by creating a new environment and provisioning the portal.
In this post we will see how we can add new Webpage in our portal we have created in our last article.
A webpage is a document that is identified by a unique URL in a website. It is one of the core objects of the website and builds a hierarchy of the website through parent and child relationships to other webpages.
The below is our Portal we have created.

Changing Top navigation Menu
First Edit the Portal App by following the steps explained in the prvious article. Once the Portal opens in Power Portal editor lets analyze the header navigation of our portal.
In the below screnshot we can see in the leftside the Page list is present. When we cclik the ellipse button at header we can see header navigation menu at right side selected as “Primary Navigation”.

When we Browse Website we can see the only Home, Knowledge Base, Forum, My Support, Search button, dorpdown (profile,Sognout) appears. Where is the Pages Link as we have many pages in the page area???

The answer is we have to change the Navigation Menu as “Default” instead of “Primary navigation” as per below screenshot.
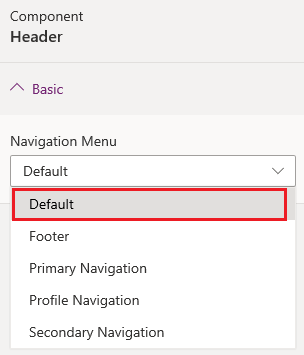
Now after updating the Navigation Menu as “Default” click on “Sync Configuration” and then “Browse Website”. Now we can see our page links are showing in the top navigation.

If we want to hide some links then we can edit the page setting as “Hide in Default Menu”. Now lets do this setting for Error page, Sitemap Page, Poll Archieve Page.

Now we have disabled the below crossed pages from the default menu.

After doing this setting our top header navigation will look like as below.

This is how we can change the Navigation Links for Portals hosted in Dynamics 365 Instance
Adding a new Web Page
To add a new page click on + New Page option dropdown which will provide Layout option such as “Blank”, “Landing Page”. We can also use Fixed Layout Pages as given below screenshot. lets choose a Blank page.

After selecting the new page,update the Page name as “Our Blog”, partial Url as “our-blog” and template as “Default Studio Template”.
NOTE: The Page Name will display as Web page Title.

Now we can add some header text below the logo. Select a section and add a Text Component.


After adding a Text Component The Text are highlights and prompts to edit the text. We change the text as “Our Blog” and change the font size 28px with bold.

Now we have done our page simply adding the page with a text header as “Our Blog”. Lets Test. Click on “Sync Configuration” then “Browse Website”. Please note our navigation is selected as “Default” so that our new page should show as a link in top menu. Here we go. The new Page is added.

We can compose the page adding multiple sections, images banners etc on the page. We can add below components on the page.

Now add some more sections and add a new list to show some blogs from Dynamics 365 system entity.

We want to show a blog list of our Dynamics 365 Instance entity whose name is Blog in a list in our Page “Our Blog” in the Portal.
NOTE : I have created an Entity called as “Our Blog” and added some records to this entity so that I can use in our portal page.
The entity holds records as per below screenshot.

Now we have to add an Entity List using Portal Management App (Dynamics 365 Portal App).

navigate to Entity List and add new Entity list for Blogs entity. Mention the name of Entity List as “Our Blogs”, Select Entity as “Blogs(new_blog )”, Select the Portal to be used, Add a view in the below section.

Once th Entity list is added and saved, go back to Power App portal Designer and select the list component on the “Our Blog” page and set the properties of the List as per given below.
Select “Use Existing” option and in the Name dropdown select “Our Blogs” Entity list we have creatd in the previous step. Select Entity as “Blogs”, View as “Active View”.

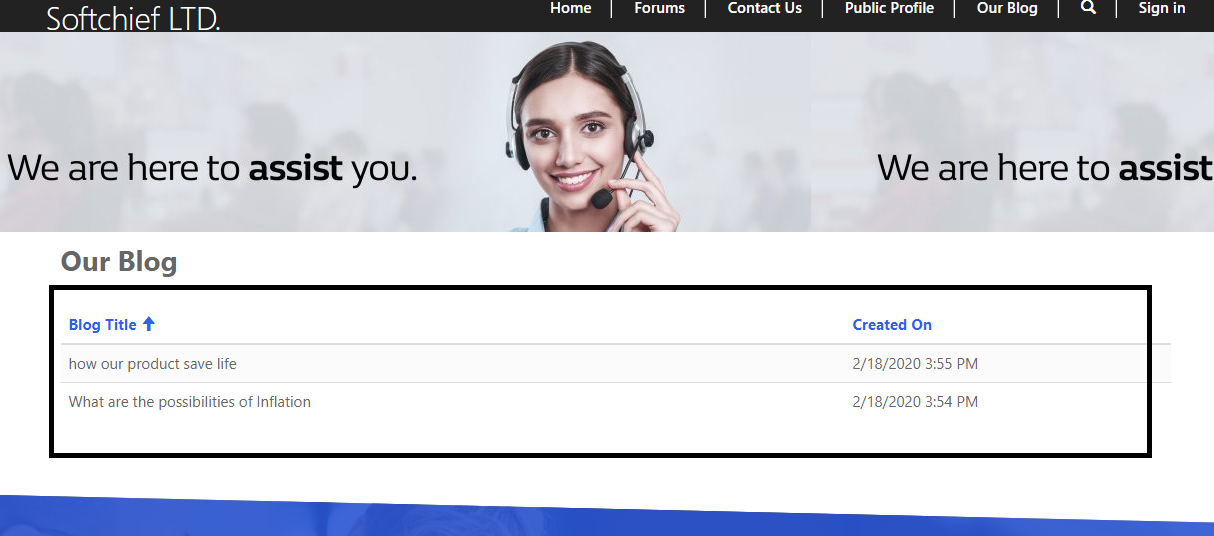
Once the configuration is Saved click on “Sync Configuration” and then “Browse website”. We can see the list of Blog records showing on the page.

Here we just can see the list that cannot be edited/updated/deleted.
Thank you for reding the article. In the next article we will discuss how to enable “Create New Record”, “View Details”, “Edit Record” “Delete Record” for the List we have created on “Our Blog” Page.

Don’t miss the chance to participate in the upcoming Internship Program which will be done using Microsoft Dot Net Web Development Full Stack Technology. The new batch will be starting from May 20, 2024. We will have most experienced trainers for you to successfully complete the internship with live project experience.
Why to choose Our Internship Program?
Industry-Relevant Projects
Tailored Assignments: We offer projects that align with your academic background and career aspirations.
Real-World Challenges: Tackle industry-specific problems and contribute to meaningful projects that make a difference.
Professional Mentorship
Guidance from Experts: Benefit from one-on-one mentorship from seasoned professionals in your field.
Career Development Workshops: Participate in workshops that focus on resume building, interview skills, and career planning.
Networking Opportunities
Connect with Industry Leaders: Build relationships with professionals and expand your professional network.
Peer Interaction: Collaborate with fellow interns and exchange ideas, fostering a supportive and collaborative environment.
Skill Enhancement
Hands-On Experience: Gain practical skills and learn new technologies through project-based learning.
Soft Skills Development: Enhance communication, teamwork, and problem-solving skills essential for career success.
Free Demo Class Available


