How to Send Email with Attachments using Gmail Connector from Canvas Apps | Power Apps
Canvas Apps Power Apps is a powerful no-code less-code platform to develop applications for enterprises targeting mobile and TAB devices. The Power FX is used as a less-code to make the Canvas App more dynamics. If you want to read and watch all canvas app related videos you can check out my YouTube channel here.
Here in this post I will explain you how to send email from canvas apps using Gmail connector and most importantly sending email with attachment because adding attachment functionality is not simple. It requires more work-arounds.
So let us start.
Step-1: Design the Canvas APP as below.
Create a Canvas APP and add required input controls such as Email TO, Email Subject, Email Body and a button.

Adding all the controls is easy drag and drop but for attachment there is no controls in Canvas APP so we have to add an Edit Form and connect to a SharePoint list to take the control from the form. Follow the below steps to do this.
Open SharePoint and create a Site as I have created a site called as ‘Softchief Site‘ and add a List Component. As I have added a Products List component.

Now go to Canvas APP and add a Edit Form control on a new screen and connect to the SharePoint and Product List. Now you can get the attachment control.


Now select the Attachment control only and cut and paste in your existing screen where you have added Email To, Body and Subject.
Now your Canvas app screen will look like as below.

Step-2: Add Gmail Connector using Data area left panel of canvas app.
Add required Gmail connector as we want to send email using Gmail connector. If you already connector its not required. If you are connecting fresh then you have to login using Gmail credential.

after this step we have to use Gmail connector function SendEmail for Send button.
Before proceeding further step most important is renaming controls properly. Use the naming as I have taken below otherwise you can take on your own choice. Button1, txtbody, attachmentctrl, txtsubject, txtto.

Step-3: Add SendEmail code for Send Button.
As we have connected to Gmail and added attachment control now we want to write code for Send button. CLick the button and go to OnSelect property and copy the below code and paste.
ClearCollect(files,attachmentctrl.Attachments);
Gmail.SendEmailV2(txtto.Text,
                    {
                        Subject: txtsubject.Text,
                        Body: txtbody.Text,
                        Attachments: AddColumns(
                                                RenameColumns(
                                                        files,
                                                        "Value",
                                                        "ContentBytes"
                                                        ),
                                                "ContentType",
                                                "application/octet-stream"
                                                )
                    }
                );
Notify("Email Sent.",NotificationType.Success);
In the above code I am using ClearCollect method which will store the the attachment files in a Collection table and before storing I am clearing the collection so that it will not duplicate. Then Gmail.SendEmailV2 function is used to send email.
Send Email function in Gmail connector takes two parameters. First TO whom you are sending email. and Second is a json parameter which accepts Subject, Body, Cc, Bcc, Attachments.
The collection object stores data in 2 columns Name and Value. The attachment property takes Table object so we have to provide the collection object to it Where I am adding a new column method and renamed the collection column from ‘Value’ to ‘ContentBytes’. For AddColums method the first parameter passed as Renamed collection object, second parameter as “ContentType” and third parameter as “application/octet-stream”. At last I am usign a Noty=ify function to display a notification after email sent.
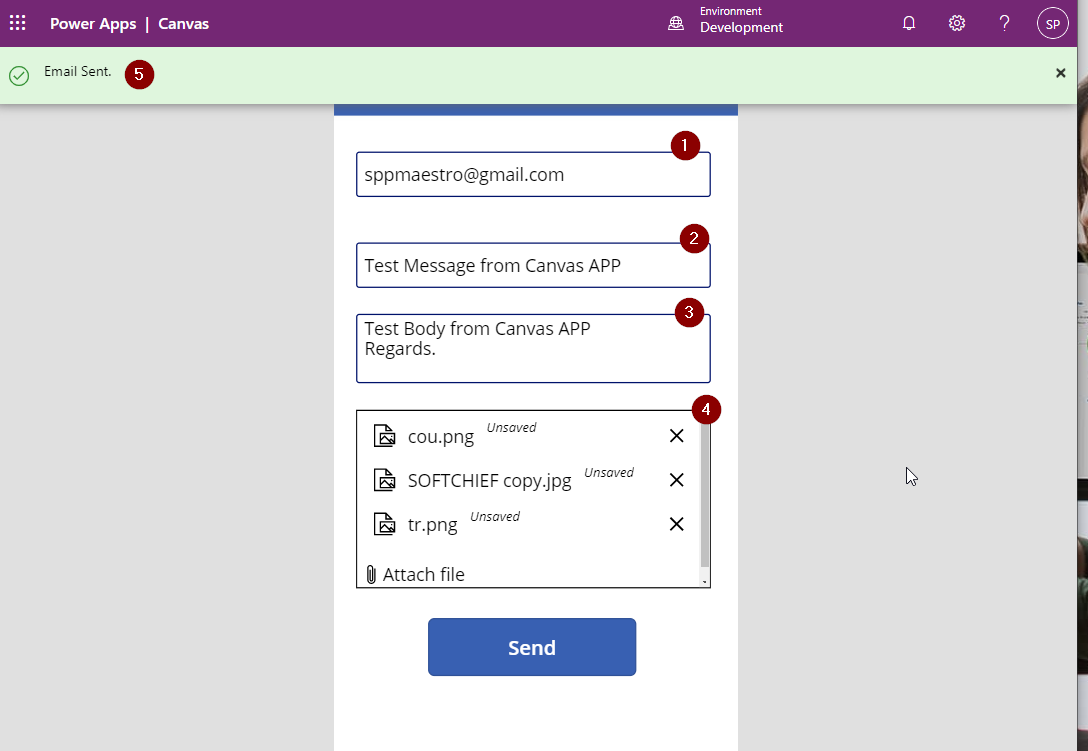
Step-4: Test code
Now let us test the code. click Run button on canvas app to run the app. Now after giving all details such as Email To, Email Subject, Email Body and attached some files then clicked Send button the email sent and the notification displayed as Email Sent.

The email which is received as below with attachment.

I hope this helps.
For more related blogs see below.

Don’t miss the chance to participate in the upcoming Internship Program which will be done using Microsoft Dot Net Web Development Full Stack Technology. The new batch will be starting from May 20, 2024. We will have most experienced trainers for you to successfully complete the internship with live project experience.
Why to choose Our Internship Program?
Industry-Relevant Projects
Tailored Assignments: We offer projects that align with your academic background and career aspirations.
Real-World Challenges: Tackle industry-specific problems and contribute to meaningful projects that make a difference.
Professional Mentorship
Guidance from Experts: Benefit from one-on-one mentorship from seasoned professionals in your field.
Career Development Workshops: Participate in workshops that focus on resume building, interview skills, and career planning.
Networking Opportunities
Connect with Industry Leaders: Build relationships with professionals and expand your professional network.
Peer Interaction: Collaborate with fellow interns and exchange ideas, fostering a supportive and collaborative environment.
Skill Enhancement
Hands-On Experience: Gain practical skills and learn new technologies through project-based learning.
Soft Skills Development: Enhance communication, teamwork, and problem-solving skills essential for career success.
Free Demo Class Available


