Dataflow Configuration in Dataverse – in details
Dataflow gives us a flexibility to pull data from an external data source and push it in Dataverse without any custom code. The dataflow will use connectors to pull data and push data. Follow the steps below to work with Dataflow.
Step:1 – Login Office.com and navigate to Dataflow
Login office.com using your credential and then click Power Apps icon from the homepage. On the Power Apps screen choose the correct environment from top right corner.
Once the environment is selected then go to left panel and expand Dataverse option and choose Dataflow.

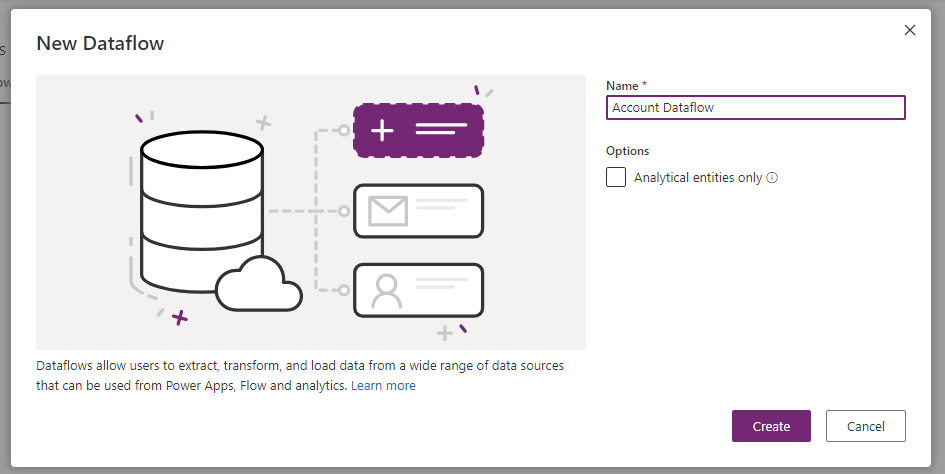
Click on Create a dataflow and then choose Start from blank. provide a name for the dataflow and click Create.

Now choose a data source from the list. Lets choose OneDrive as I want to create a flow which will read data from OneDrive and push in Accounts in Dataverse. Choose Files option from the menu and select Excel workbook.

Now define the file path by using Browse OneDrive feature. I have already an Excel file which is stored in OneDrive where I store my accounts. Now It will display all excel file and choose your file and click Select.

The connection will be created and click Next. Now choose your sheet from next screen. it will display all records which are part of the sheet.

Now click Transform Data. If you want to transform data do the changes and click Next or simply click Next. Now here you can choose a new table to load data or existing table or do not load. Choose Existing table.
Choose Account from the dropdown. if you want to delete the records in destination table which are not in the data flow result then select the check box. Now map the corresponding fields of destination table with source table.

Now at this step you can configure the data refresh timing, You can choose to refresh manually so that the data will not refresh automatically. If you want to refresh the data every 1 hour then choose Automatic refresh and configure timing.

Once done click on Publish. Now we are done with our Dataflow. The dataflow will run now.

Now you can check table data. Hope this helps.

Don’t miss the chance to participate in the upcoming Internship Program which will be done using Microsoft Dot Net Web Development Full Stack Technology. The new batch will be starting from May 20, 2024. We will have most experienced trainers for you to successfully complete the internship with live project experience.
Why to choose Our Internship Program?
Industry-Relevant Projects
Tailored Assignments: We offer projects that align with your academic background and career aspirations.
Real-World Challenges: Tackle industry-specific problems and contribute to meaningful projects that make a difference.
Professional Mentorship
Guidance from Experts: Benefit from one-on-one mentorship from seasoned professionals in your field.
Career Development Workshops: Participate in workshops that focus on resume building, interview skills, and career planning.
Networking Opportunities
Connect with Industry Leaders: Build relationships with professionals and expand your professional network.
Peer Interaction: Collaborate with fellow interns and exchange ideas, fostering a supportive and collaborative environment.
Skill Enhancement
Hands-On Experience: Gain practical skills and learn new technologies through project-based learning.
Soft Skills Development: Enhance communication, teamwork, and problem-solving skills essential for career success.
Free Demo Class Available


