Open Custom Page from Model driven app Main grid command and pass parameters
In business requirements you need to open custom page on clicking a command button on main grid by selecting one or multiple rows. This post will explain below points.
- How to Add Custom button on Main grid command bar
- Show command button if at least one row selected else hide
- Call JavaScript to open a custom page
- Pass multiple selected row ids to custom page
- bind gallery to the selected accounts
- update records using loop in power fx in custom page.
- refresh back view or parent view after closing custom page
Follow the below steps to complete the task.
Watch the below video to know practically or scroll down to read the article.
Step 1 – Create a Custom Page and Add components and PowerFX
Add a custom page in your model driven app. here I have taken Sales Hub model driven app and opened in modern app designer. I added a custom page.
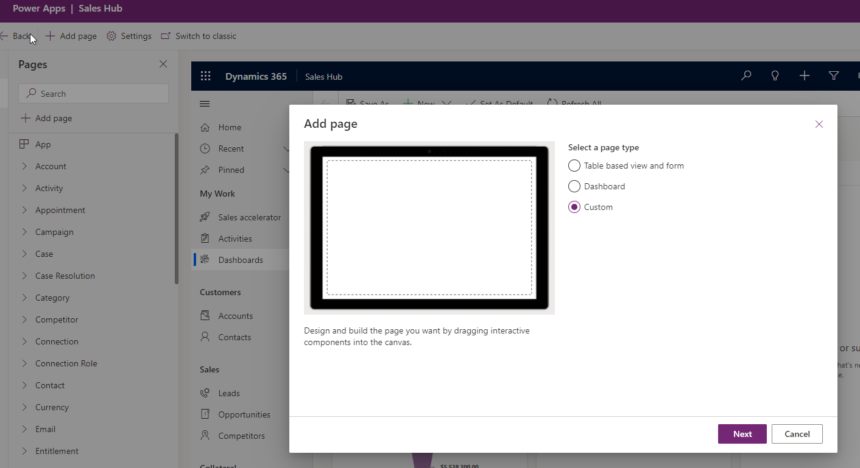
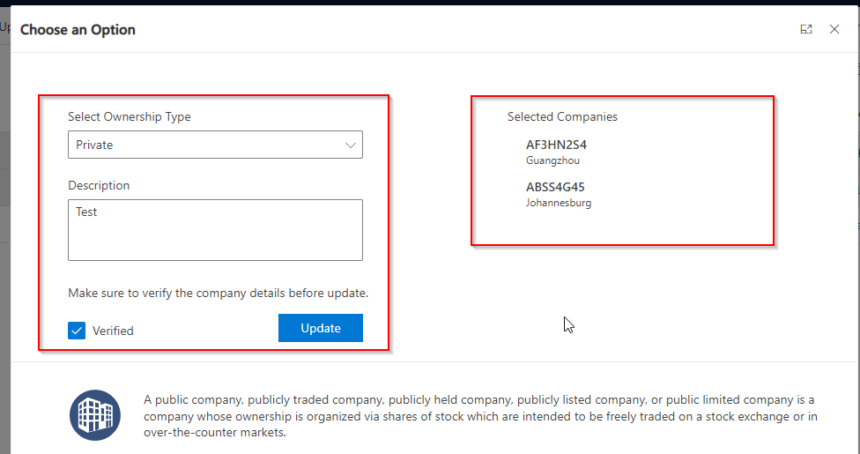
Once you add new custom page it will open in new canvas editor window. The Custom page looks like below.
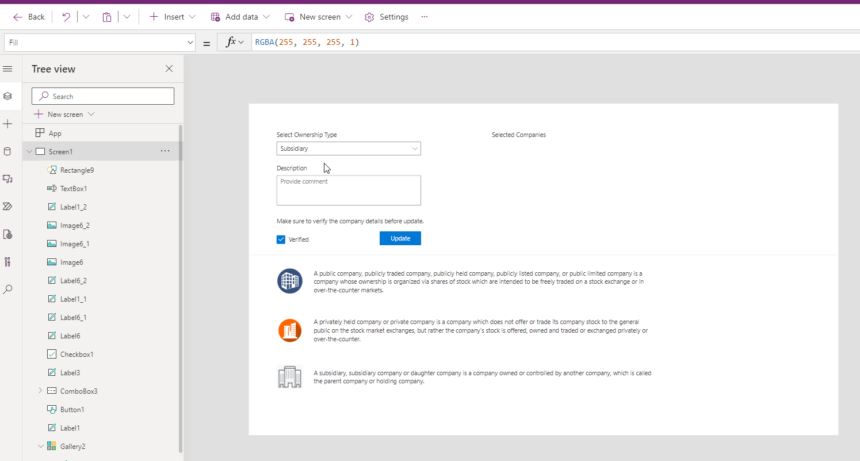
Take 3 images and some labels to display like paragraphs.
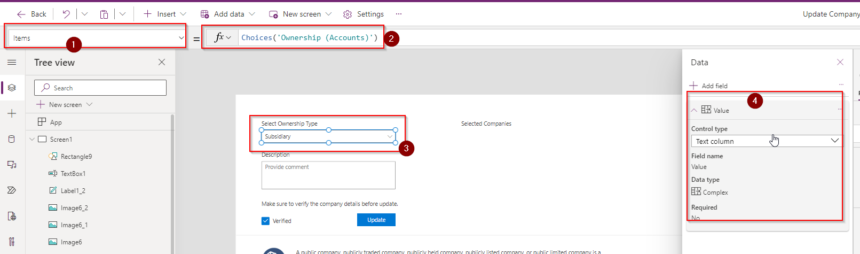
Take a Combo-box and associate the below powerfx in Items.
Choices(‘Ownership (Accounts)’)
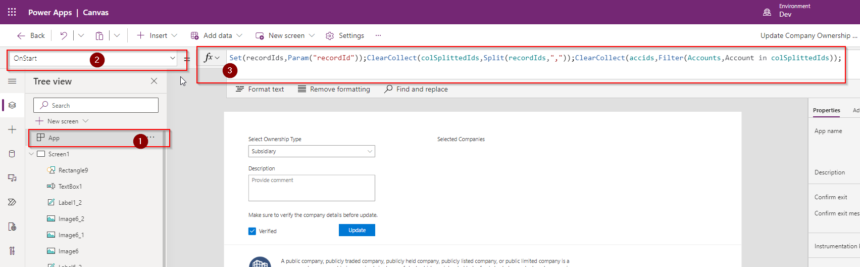
Take another textbox with multiline mode and in the App On Start add below PowerFX.
Set(recordIds,Param(“recordId”));ClearCollect(colSplittedIds,Split(recordIds,”,”));ClearCollect(accids,Filter(Accounts,Account in colSplittedIds));
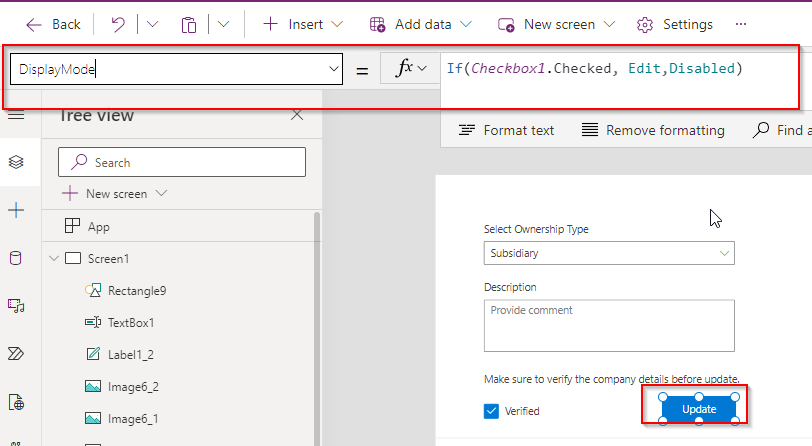
Take a checkbox and a button.
In the button DisplayMode add below PowerFX.
If(Checkbox1.Checked, Edit,Disabled)
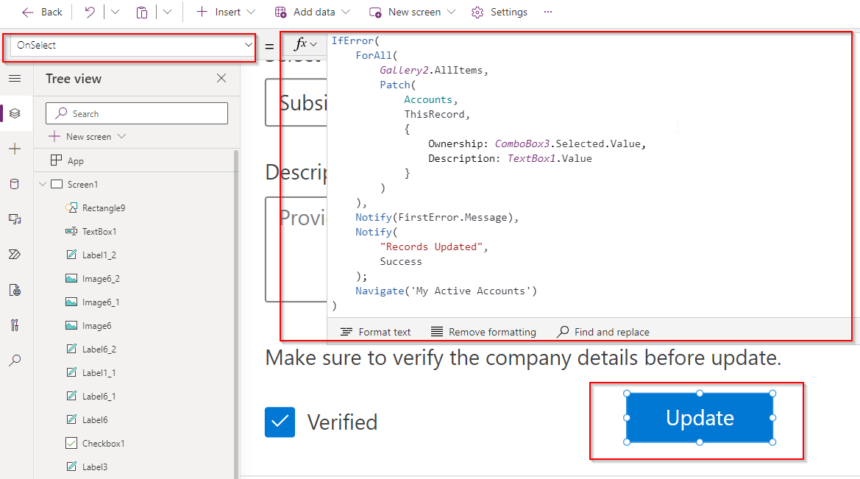
In the OnSelect Property of button add below PowerFX.
IfError(
    ForAll(
        Gallery2.AllItems,
        Patch(
            Accounts,
            ThisRecord,
            {
                Ownership: ComboBox3.Selected.Value,
                Description: TextBox1.Value
            }
        )
    ),
    Notify(FirstError.Message),
    Notify(
        "Records Updated",
        NotificationType.Success
    );
    Navigate('Accounts (Views)'.'My Active Accounts')
)
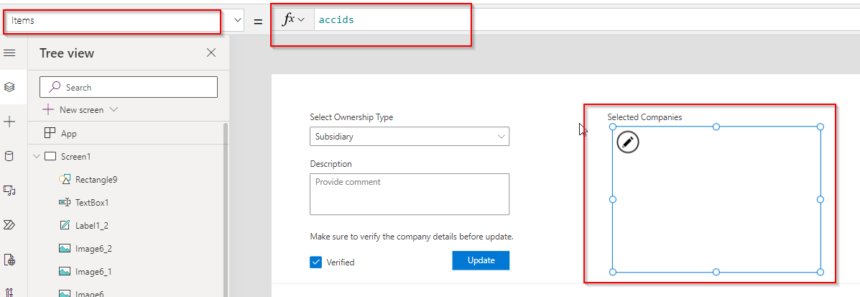
In the gallery associate the collection variable.
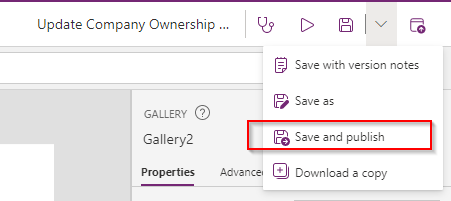
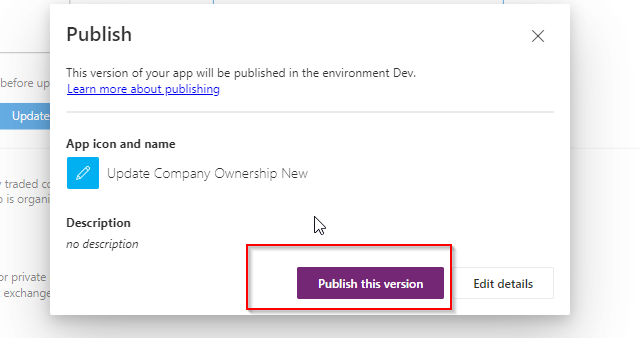
Save and Publish the Custom Page. also publish the current version.
Next Publish the Model driven app in the modern designer.
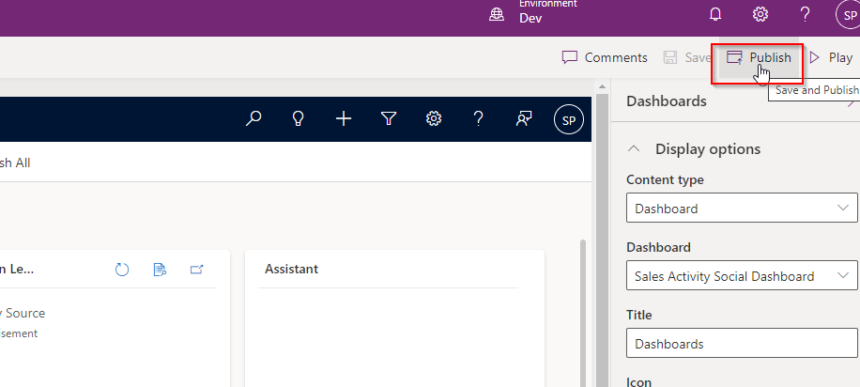
NOTE : You must add the custom page inside the model driven app.
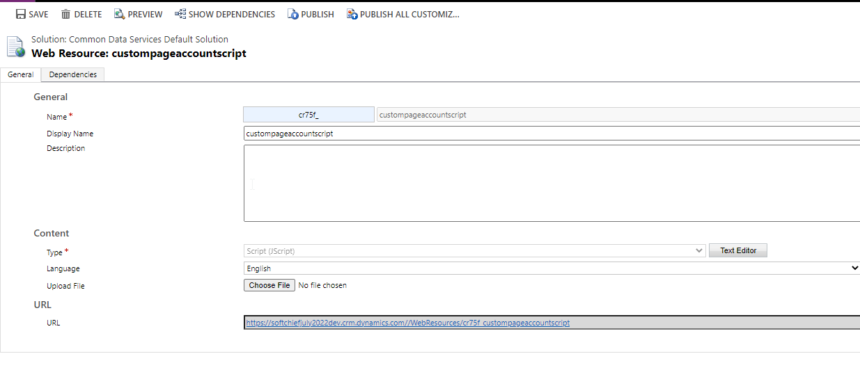
Step 2 – Create a JS Web Resource to open Custom page and pass parameter
Create a JS web resource add the below JavaScript code.
function openpage(data)
{
   var selectedRecordID = data;

// Inline Page
var pageInput = {
    pageType: "custom",
    name: "cr75f_updatecompanyownershipnew_dbd6b",
    recordId: selectedRecordID
};
var navigationOptions = {
    target: 2,
    position: 1,
    width: {value: 50, unit:"%"},
    title: "Choose an Option"
};

Xrm.Navigation.navigateTo(pageInput, navigationOptions)
    .then(
        function () {
            // Called when page opens
        }
    ).catch(
        function (error) {
            // Handle error
        }
    );
}
Step 3 – Add Visibility Condition for command button on main grid
add below powerfx to add conditional visibility for command button.
If(CountRows(Self.Selected.AllItems)>0,true,false)
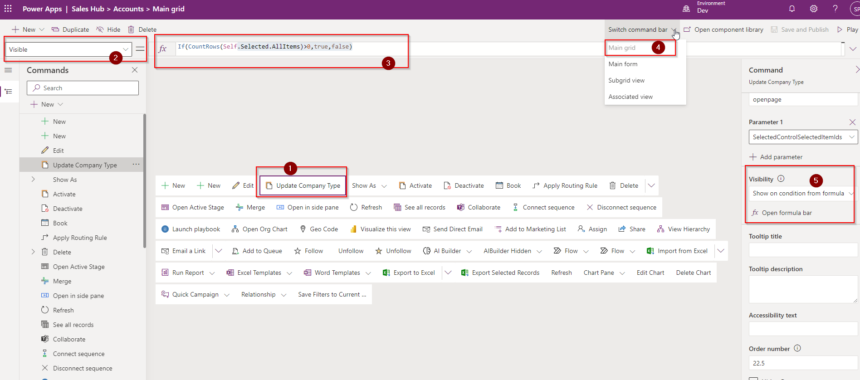
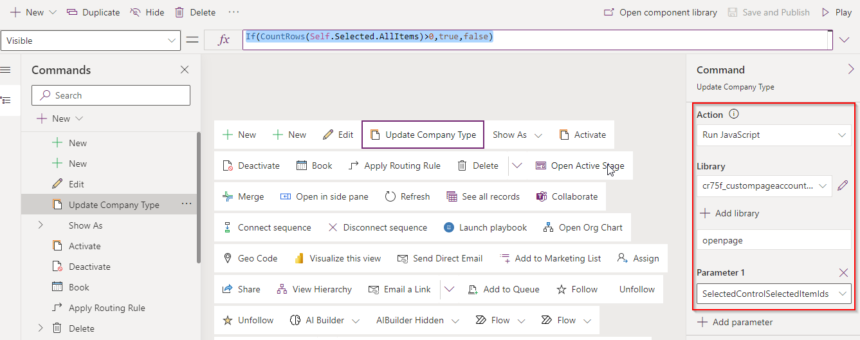
Step 4 – Call JS Action from command button
Add action JS and pass SelectedControlSelectedItemIds.
Now test.
Open Account View and select at least one record, you will see the button.
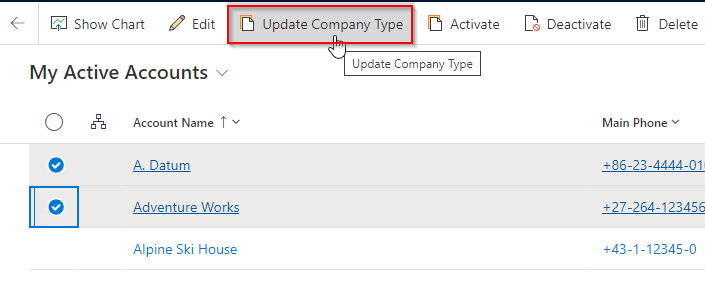
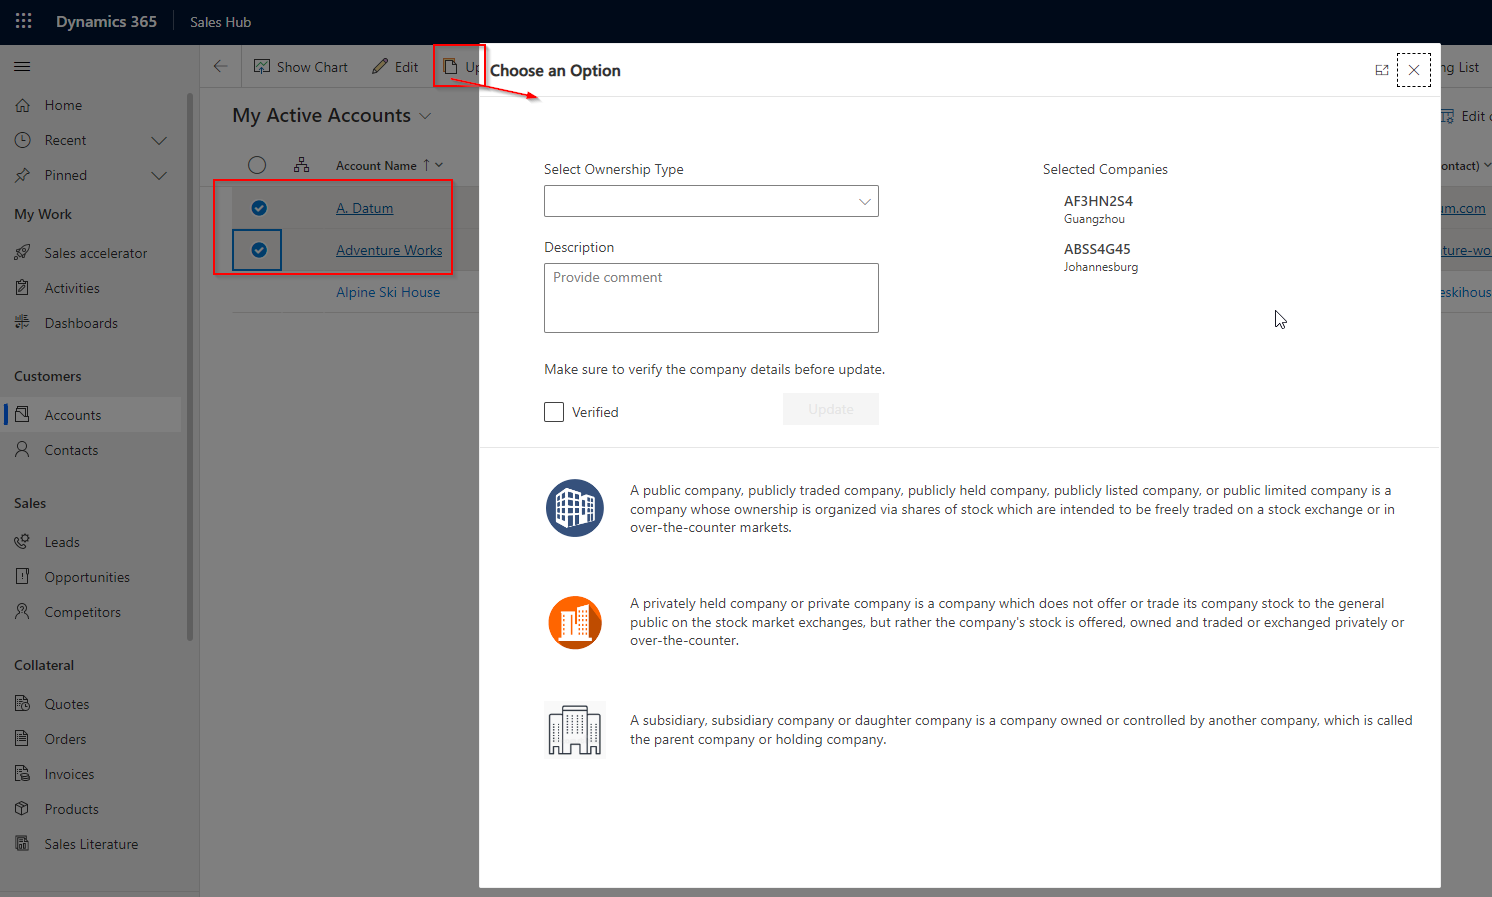
on click of button it opens custom page.
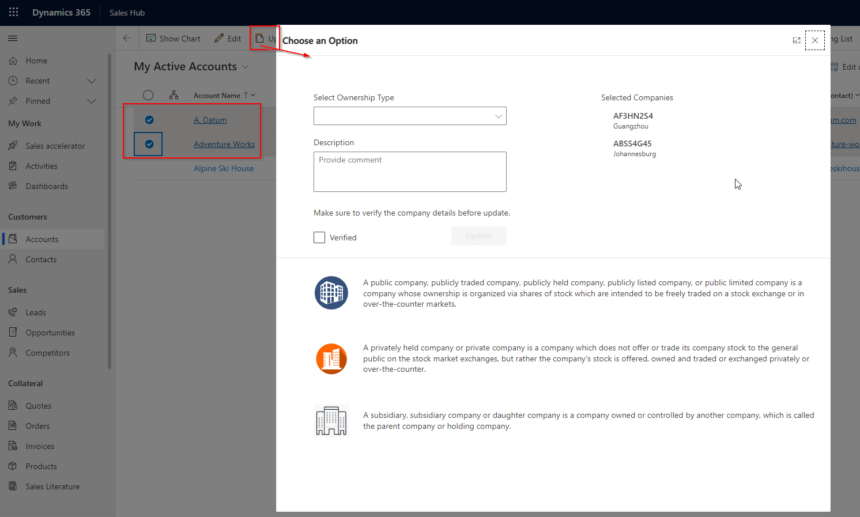
Select type and give description, click checkbox and click button.
on clicking of update it will show success message.
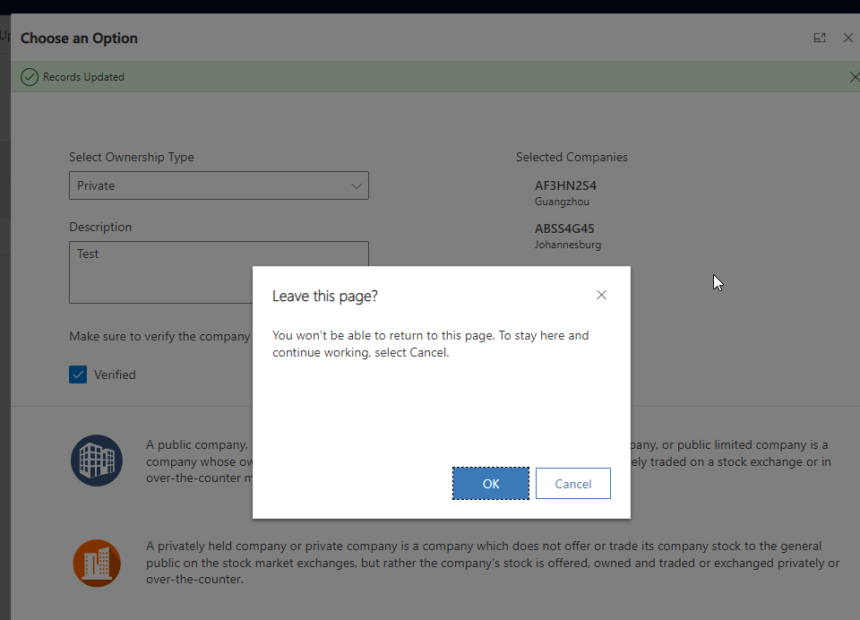
Click on OK to refresh the view.

Hope this helps.
Follow my blog for more trending topics on Dynamics 365, Azure, C#, Power Portals and Power Platform. For training, Courses and consulting, call to us at +91 832 886 5778 I am working more for community to share skills in Dynamics 365 and Power Platform. Please support me by subscribing my YouTube Channel. My YouTube Channel link is this : https://www.youtube.com/user/sppmaestro

Don’t miss the chance to participate in the upcoming Internship Program which will be done using Microsoft Dot Net Web Development Full Stack Technology. The new batch will be starting from May 20, 2024. We will have most experienced trainers for you to successfully complete the internship with live project experience.
Why to choose Our Internship Program?
Industry-Relevant Projects
Tailored Assignments: We offer projects that align with your academic background and career aspirations.
Real-World Challenges: Tackle industry-specific problems and contribute to meaningful projects that make a difference.
Professional Mentorship
Guidance from Experts: Benefit from one-on-one mentorship from seasoned professionals in your field.
Career Development Workshops: Participate in workshops that focus on resume building, interview skills, and career planning.
Networking Opportunities
Connect with Industry Leaders: Build relationships with professionals and expand your professional network.
Peer Interaction: Collaborate with fellow interns and exchange ideas, fostering a supportive and collaborative environment.
Skill Enhancement
Hands-On Experience: Gain practical skills and learn new technologies through project-based learning.
Soft Skills Development: Enhance communication, teamwork, and problem-solving skills essential for career success.
Free Demo Class Available


