Set Lookup field using Xrm.WebAPI Javascript in dataverse power apps

When you call Create or Update methods using Xrm.WebAPI client objects, you need to take special care while setting value of lookup fields. Follow below method to do this.
Step 1 – Identify Navigation Property Name of the Lookup Column
Open the METADATA url and search the column.
The metadata url is like this https://devboxsoftchief.crm8.dynamics.com/api/data/v9.2/$metadata
you can get the Web API end point using Developer Resources from power apps screen.
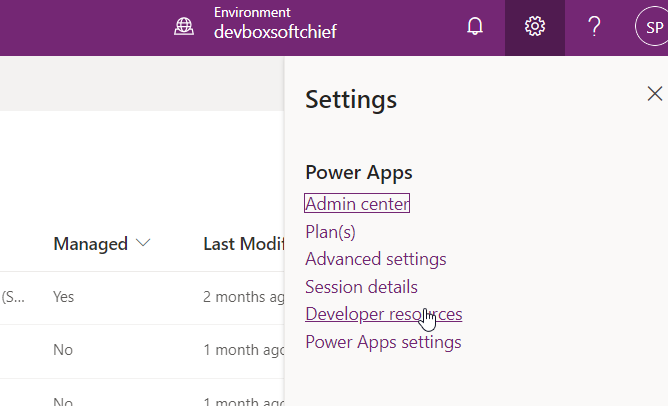
From the side panel copy the Web API EndPoint.

Append $metadata to the URL and browse it.
Now search the column name to get the Navigation Property from entity metadata.
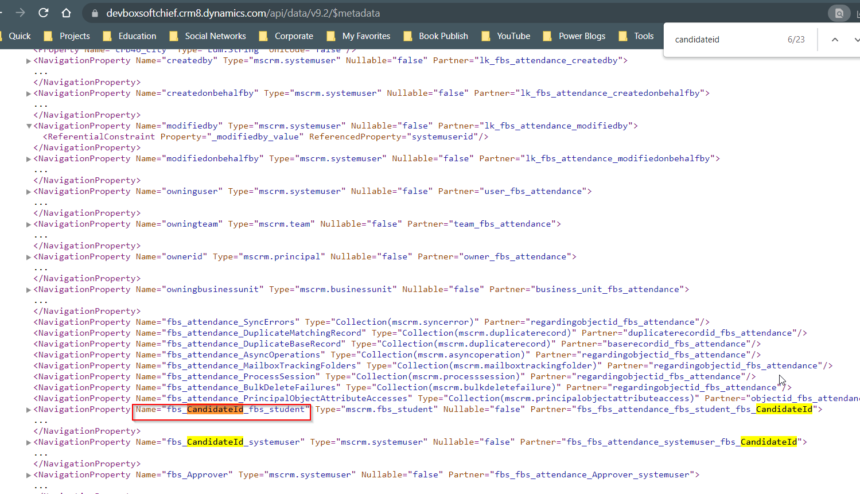
Copy the name of Navigation Property for me its fbs_CandidateId_fbs_student
Step 2 – Use navigation property in Xrm.WebAPI call
use the below code to create record.
function createAttendance(context)
{

	var formContext = context.getFormContext();
	var studentname = formContext.getAttribute("fbs_studentname").getValue();

	var studentid = formContext.data.entity.getId();

	// define the data to create new attendance record
		var data =
			{
				"fbs_name": "Attendance for "+ studentname,
				"fbs_CandidateId_fbs_student@odata.bind": "/fbs_students("+studentid.replace("{","").replace("}","")+")",
				"fbs_entrytime": new Date(),
				"fbs_exittime": new Date(new Date().setHours(new Date().getHours() + 8))
			}

		// create account record
		Xrm.WebApi.createRecord("fbs_attendance", data).then(
			function success(result) {
				var alertStrings = { confirmButtonLabel: "Yes", text: "The attendance created successfully.", title: "Message" };
				var alertOptions = { height: 120, width: 260 };
				Xrm.Navigation.openAlertDialog(alertStrings, alertOptions).then(
					function (success) {
						console.log("Alert dialog closed");
					},
					function (error) {
						console.log(error.message);
					}
				);
			},
			function (error) {
				alert(error.message);
			}
		);
}
Now create web resource and attach event handler in form now it will work.
hope this helps.

Don’t miss the chance to participate in the upcoming Internship Program which will be done using Microsoft Dot Net Web Development Full Stack Technology. The new batch will be starting from May 20, 2024. We will have most experienced trainers for you to successfully complete the internship with live project experience.
Why to choose Our Internship Program?
Industry-Relevant Projects
Tailored Assignments: We offer projects that align with your academic background and career aspirations.
Real-World Challenges: Tackle industry-specific problems and contribute to meaningful projects that make a difference.
Professional Mentorship
Guidance from Experts: Benefit from one-on-one mentorship from seasoned professionals in your field.
Career Development Workshops: Participate in workshops that focus on resume building, interview skills, and career planning.
Networking Opportunities
Connect with Industry Leaders: Build relationships with professionals and expand your professional network.
Peer Interaction: Collaborate with fellow interns and exchange ideas, fostering a supportive and collaborative environment.
Skill Enhancement
Hands-On Experience: Gain practical skills and learn new technologies through project-based learning.
Soft Skills Development: Enhance communication, teamwork, and problem-solving skills essential for career success.
Free Demo Class Available


