Exporting and Importing Solutions in Power Apps: A Comprehensive Guide

Introduction
Power Apps solutions are a powerful tool for managing and deploying customizations. Solutions bundle components like entities, fields, views, charts, flows, and canvas apps into a single package, making it convenient to move them from one environment to another. Power Apps offers a robust solution framework that allows developers and administrators to package and transport their customizations, configurations, and apps seamlessly across environments. This process involves exporting and importing solutions, ensuring a smooth transition and consistency in different Power Platform instances.
You can check the visual for more detail.
STEP 1:-Exporting a Solution
To import you have to first sign in in your environment . Then you have to navigate your solution. After you enter in power app then you have to click on the solution where you make your app.
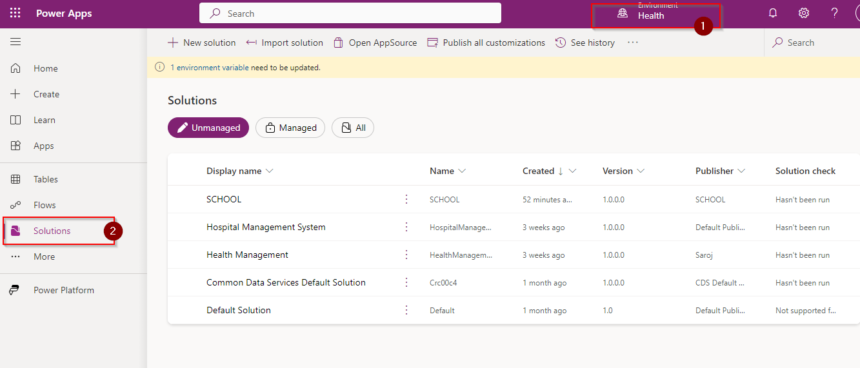
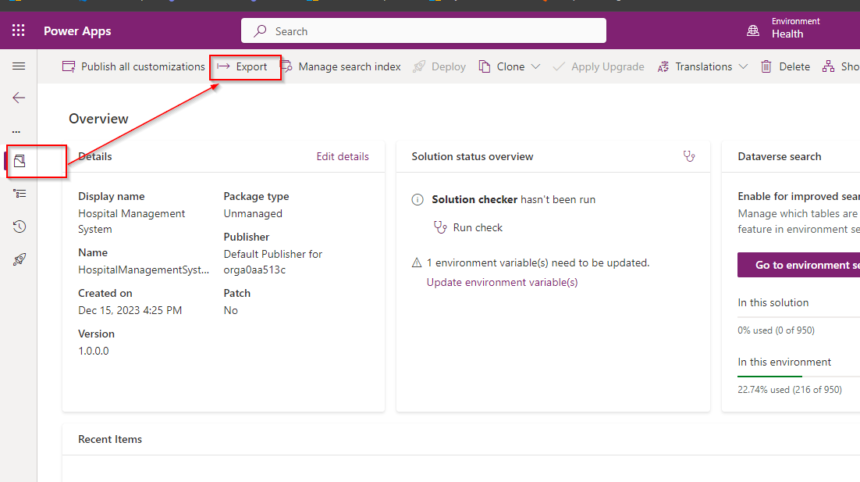
Then you have to choose your solution which you wand to Export. So click first in the solution. Then you have to click on the overview option in the left top side of your environment. Then you have to click on the Export option.
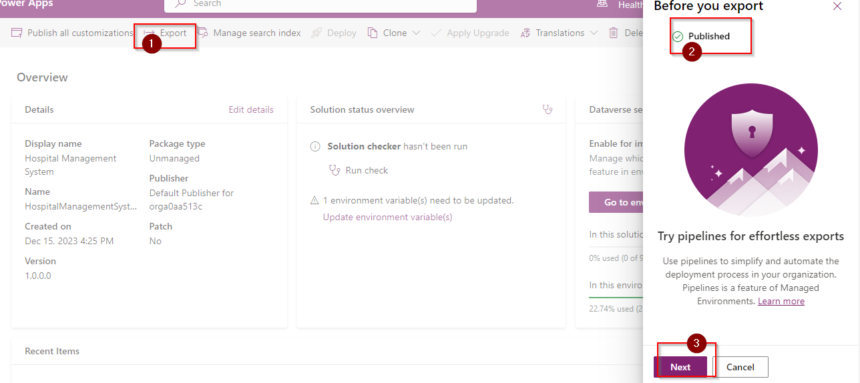
After clicking the Export option you have to publish and Run before you export. So first click on the Publish. After complete publish you have to click on the run option then you can export it.
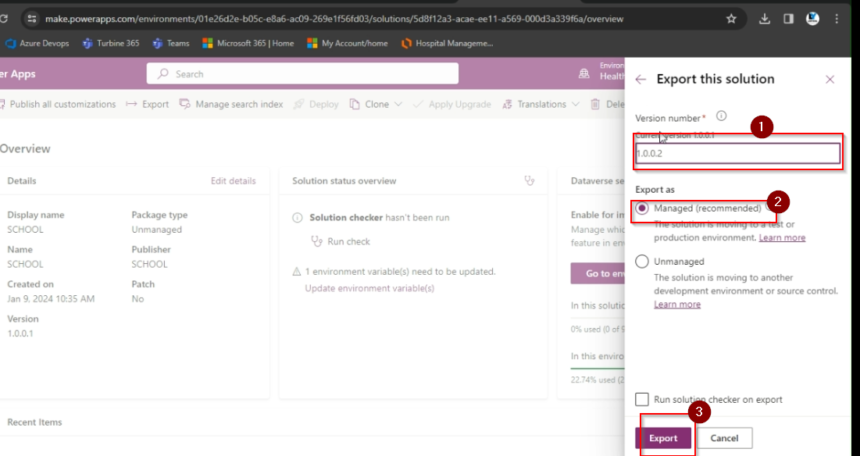
Then you have to click on next button . Then the version number and Export as option will appear .Then click on managed and click on Export.
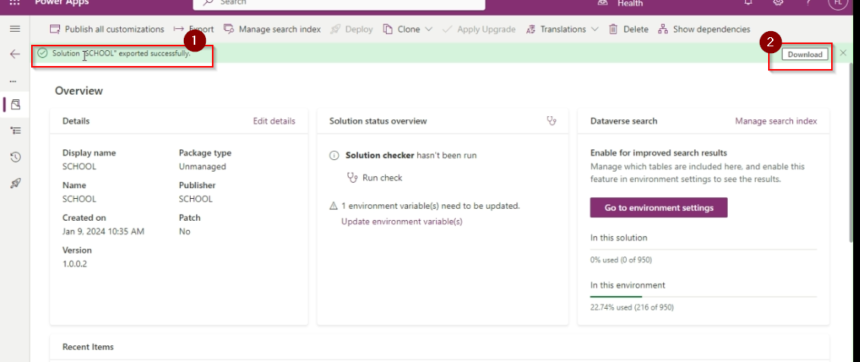
Then you get a successful exported message in the top of the screen. Then you have to download option in the right corner of the ribbon. Then you have download it first.
Step 2:-IMPORT A SOLUTION IN POWER APP
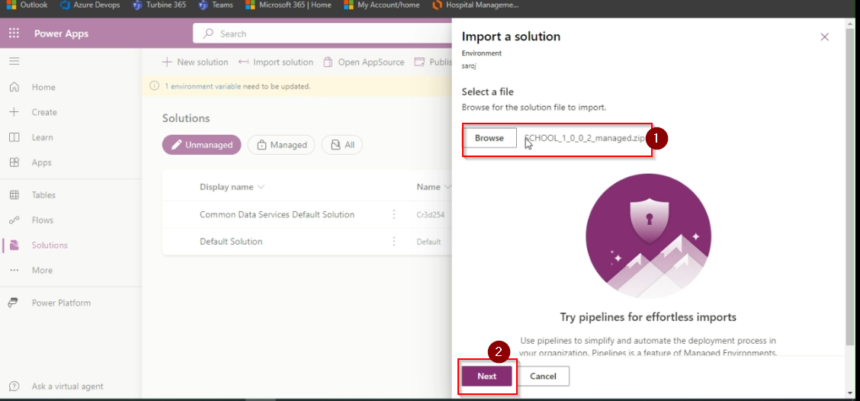
To import a solution you have to choose the another environment where you want to import your solution. After change the environment you have to click on the solution then you have to click on import option.

After clicking on the import option then you have Browse your download file from your system. Then double click on that file then you have to click on next button then you have to wait for complete the import Then you can see
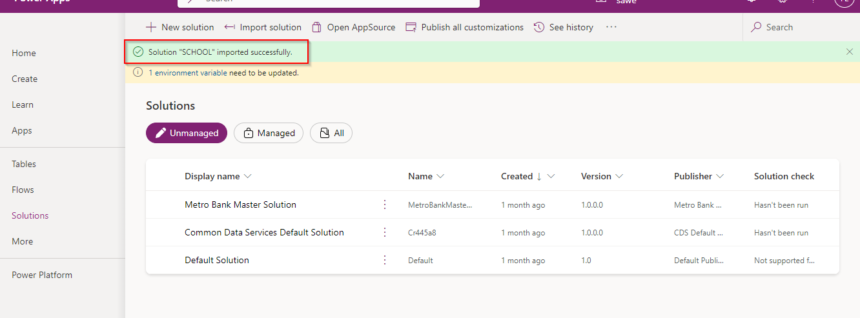
Then it will show you a success message when it is complete the import.
Hope it will help you.

Don’t miss the chance to participate in the upcoming Internship Program which will be done using Microsoft Dot Net Web Development Full Stack Technology. The new batch will be starting from May 20, 2024. We will have most experienced trainers for you to successfully complete the internship with live project experience.
Why to choose Our Internship Program?
Industry-Relevant Projects
Tailored Assignments: We offer projects that align with your academic background and career aspirations.
Real-World Challenges: Tackle industry-specific problems and contribute to meaningful projects that make a difference.
Professional Mentorship
Guidance from Experts: Benefit from one-on-one mentorship from seasoned professionals in your field.
Career Development Workshops: Participate in workshops that focus on resume building, interview skills, and career planning.
Networking Opportunities
Connect with Industry Leaders: Build relationships with professionals and expand your professional network.
Peer Interaction: Collaborate with fellow interns and exchange ideas, fostering a supportive and collaborative environment.
Skill Enhancement
Hands-On Experience: Gain practical skills and learn new technologies through project-based learning.
Soft Skills Development: Enhance communication, teamwork, and problem-solving skills essential for career success.
Free Demo Class Available


