Hide Form Field in Power Pages By using JavaScript
Introduction
Power Pages, with its robust features and dynamic capabilities, empowers users to create compelling forms for various purposes. One essential aspect of form design is the ability to control the visibility of certain fields based on user interactions or specific conditions. In this blog post, we’ll delve into the techniques and best practices on how to hide form fields on Power Pages forms, ensuring a streamlined and user-friendly experience. There is some basic steps where you can add JavaScript code to your form in Power pages. You can check this from you Tube.
Step 1:-Create a Power pages using same environment
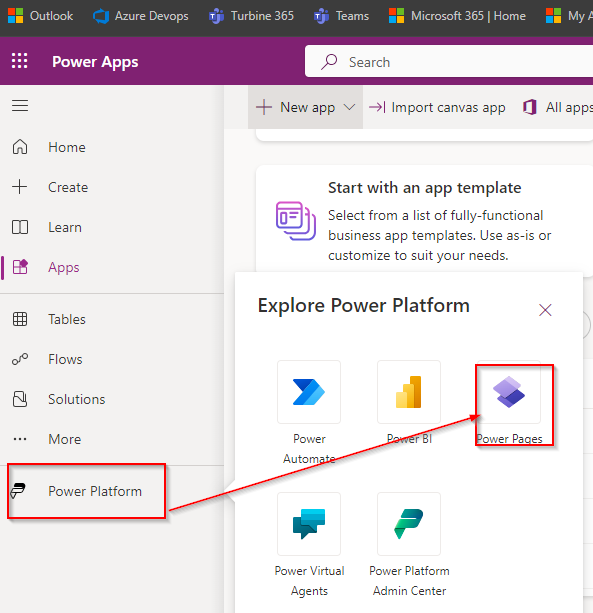
To create the power pages you have to first check the MDA’s environment and solution . Then click on the power platform then click on power pages. Then you have a new environment in the same solution.
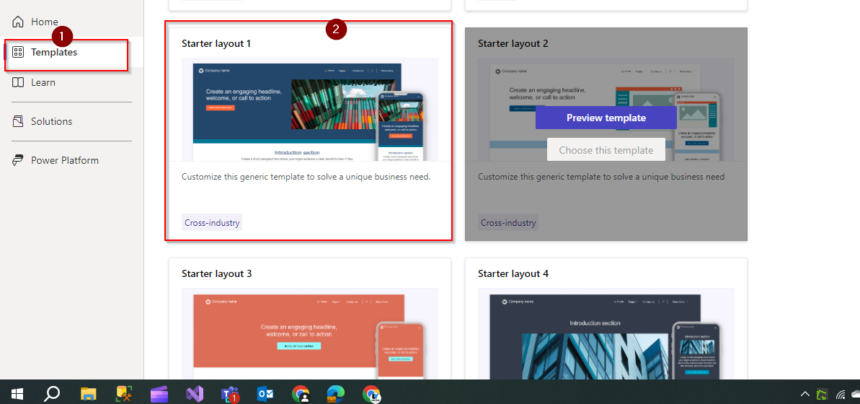
Here you have to create a new power pages and then you have to check validation. First click on template then you can choose a created template where you can just change some basic concept .Like the heading and some images as per your requirement . Here i have this template to working on. Simple you have to enter the name of the template.
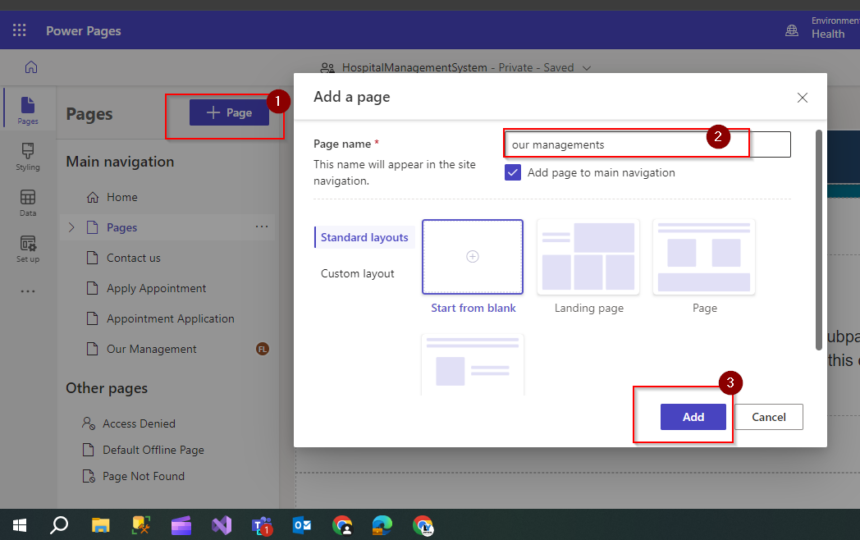
After you choose the template first you have to add a new page where you want to add a form according to your data verse.
Step 2:- Add Form According To Dataverse
Then you have to add the table form as your choice . Then click on the data then search your table in the search box and then click on the new form. Then you have to enter a form name as unique name. So it will easy to find the form name. Then click on save.
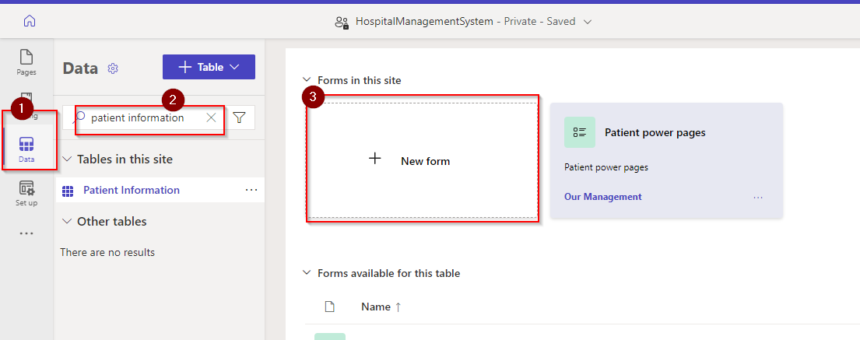
Choose your field from the dataverse then you can set the field in a organize manner. Delete the field which is not require to the user.
Step 3:- Authorization User
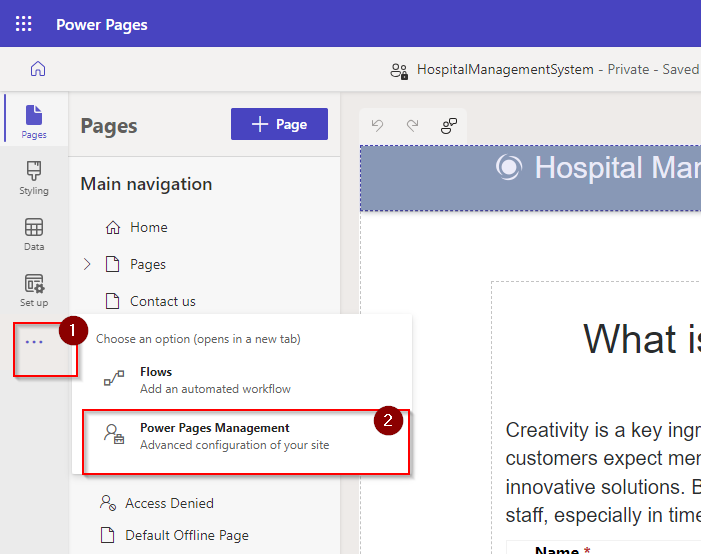
When the form is created you have to give permission to the authorize user. That mean you have to provide the access to the authorize user or Anonymous user . Go to the three dot and click on power page management.
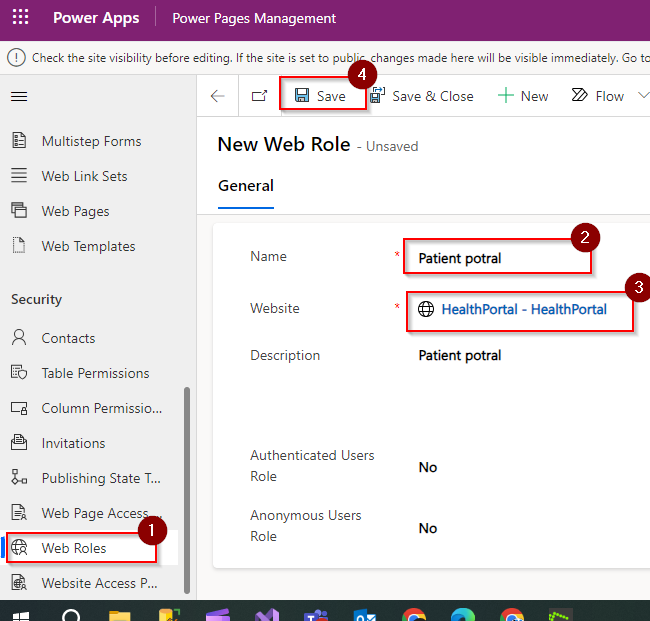
You can authorize a user by complete three process that is create a Web Role, Table permission and Contact. To create web role first click on web role then click on Add button then set the web role name then set the website environment then you can click on save button.
Then you have to add the table permission by clicking on table permission then you have to add the user as authenticated user. First add table permission.
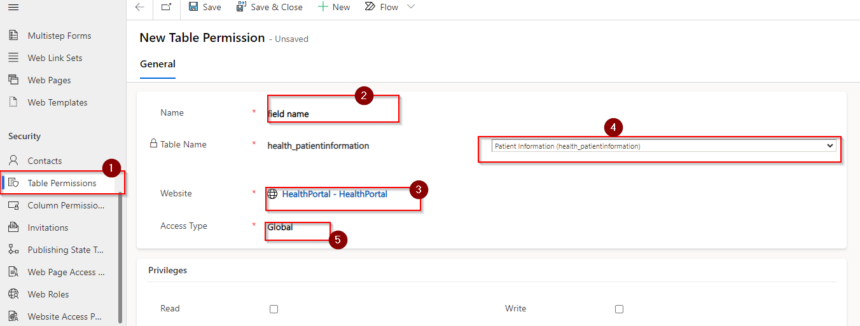
Then you have to add web role in the button part of the table permission.
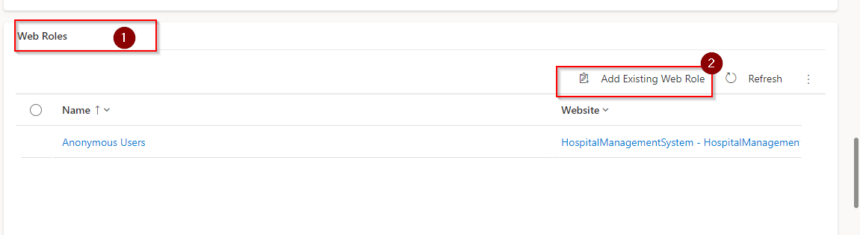
Then you have to add the user from contact which you want to add as authenticated user. Then click on the user first then click on the name of the user then add to web role and click on the add existing web role then click on save.

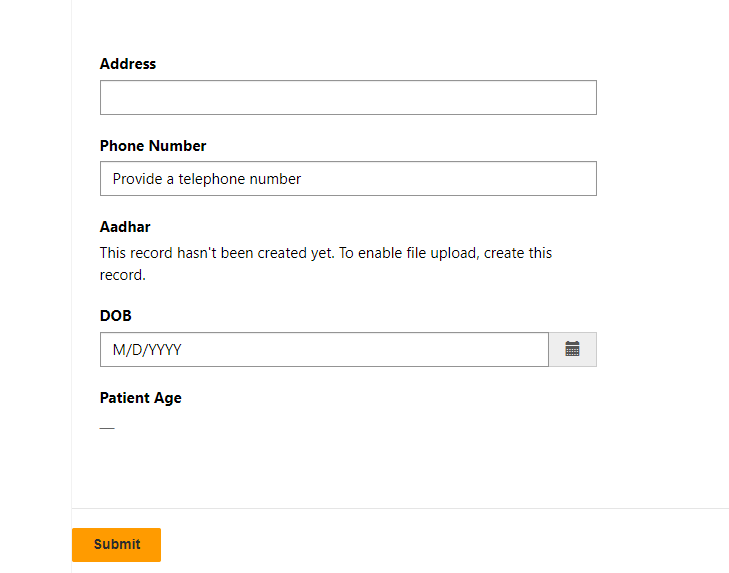
In the last step we have the form which is look like this.

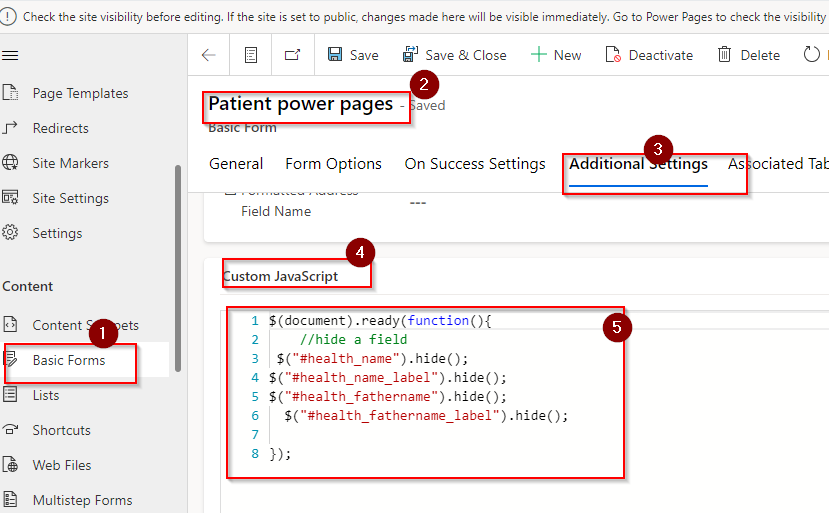
Step 4:- Hide the field using JavaScaript
In the above field we have to hide total two field from the form when the form is loading. So we have to add the javascript code to the Custom javascript. Write some code to hide two field when the form is loading.
Do not worry about the code i will provide you in below section.
$(document).ready(function(){
    //hide a field
 $("#health_name").hide();
$("#health_name_label").hide();
$("#health_fathername").hide();
  $("#health_fathername_label").hide();

});
After run the above code the form will looks like this.
Hope It will help you.

Don’t miss the chance to participate in the upcoming Internship Program which will be done using Microsoft Dot Net Web Development Full Stack Technology. The new batch will be starting from May 20, 2024. We will have most experienced trainers for you to successfully complete the internship with live project experience.
Why to choose Our Internship Program?
Industry-Relevant Projects
Tailored Assignments: We offer projects that align with your academic background and career aspirations.
Real-World Challenges: Tackle industry-specific problems and contribute to meaningful projects that make a difference.
Professional Mentorship
Guidance from Experts: Benefit from one-on-one mentorship from seasoned professionals in your field.
Career Development Workshops: Participate in workshops that focus on resume building, interview skills, and career planning.
Networking Opportunities
Connect with Industry Leaders: Build relationships with professionals and expand your professional network.
Peer Interaction: Collaborate with fellow interns and exchange ideas, fostering a supportive and collaborative environment.
Skill Enhancement
Hands-On Experience: Gain practical skills and learn new technologies through project-based learning.
Soft Skills Development: Enhance communication, teamwork, and problem-solving skills essential for career success.
Free Demo Class Available


