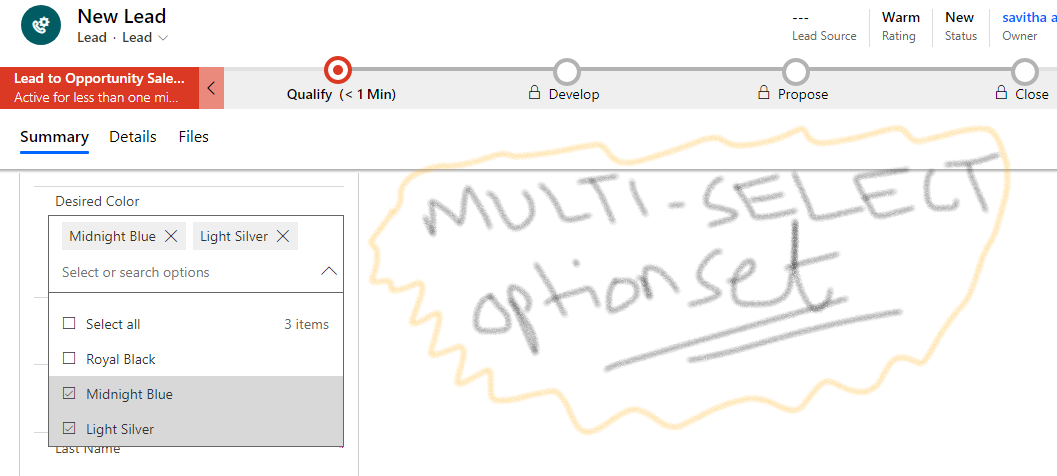
Multi-select Optionset DataType in Dynamics 365 Customer Engegement

Previously we have worked on Optionsets which allows us to select an item from a list at one time. But Dynamics 365 introduces a new data type called as “Multi-select Optionset” which allows us to select multiple items at one time.
Here we will do some practical sessions to undersnad how this Multi-select optionset works in real world scenarios. Lets say we have a requirement that, while creating lead there should be a provision to select the Vehicle and two colors of choice while creating a lead record. Lets see how to implement this.
First of all go to Advanced Settings by clicking the setting icon at top right corner of the Dyanmics 365 Home screen.

Then click on settings and customizations and Then Customize the System.

Then from the customization screen expand the Entities and select Lead Entity and select Fields.

Now Add one field named as “Vehicle” with data type “optionset” and items as “Bike”,”Car”. Then Save and close.

Now add another field of type “multi-select optionset” with items as “Royal Black”, “Midnight Blue”, “light Silver”. after adding details click save and close.

Now click on the Forms to edit the main form of Lead to show the fields on the form. Double click the items which is the main Lead form.

Drag and drop the new fields we have created on the Lead screen. Then click on Save and close.

Now click on the Lead entity node and then Click on Publish button.

One the Lead entity is published we can navigate to Main homepage and try to refresh and open an existing Lead or create anew lead to check if the fields are showing on the form.

Now as we saw the multi-select field is showing on the screen but we need to auto-populate as per the selction of Vehicle.

If Bike is selected in Vehicle the Desired color should auto populate as “Royal Black” and “Light Silver”. if Vehicle is selected as “Car” then auto-populate “Midnight Blue” and “Light Silver” in Desired Color.
To do this we need to add some custom Form Script on the onChange event of Vehicle field. Create a new Web resource with name “myscript.js” and add the script below.
function SetDesiredColorValues(executionContext)
{
   // Get the form context from the execution context
   var formContext = executionContext.getFormContext();

   // Get the value for product type option set
    var vehicleType = formContext.getAttribute("new_vehicle").getValue();

   // Create a new Array
    var newValues = new Array();

 // Check if vehicle type is Bike
    if (vehicleType == 100000000) {
         // Set the array values for Sales and Retail
         newValues = [100000000, 100000002];
    }
   // Check if vehicle type is Car
    else if (vehicleType == 100000001) {
         // Set the array values for Sales and Technology
        newValues = [100000001, 100000002];
    }

   // Set the multi select option set Industry
    formContext.getAttribute("new_desiredcolor").setValue(newValues);
}
Save and Publish the Web resource and then double click the Vehicle field on the Lead main Form to open the details windows. Now select the Event tab and add the library “myscript.js” and attach the event in event handler. Dont forget to click the checkbox to pass execution context as first parameter.
Now Publish all customization and navigate to the Lead screen and refresh to check if the logic works or not.

Now Test the implementation.

Bike Selected as Vehicle


