Send Email using Email Templates with Power Automate Flow
You can send emails using Email Templates with Power Automate. Follow the below steps to use email templates with Power Automate.
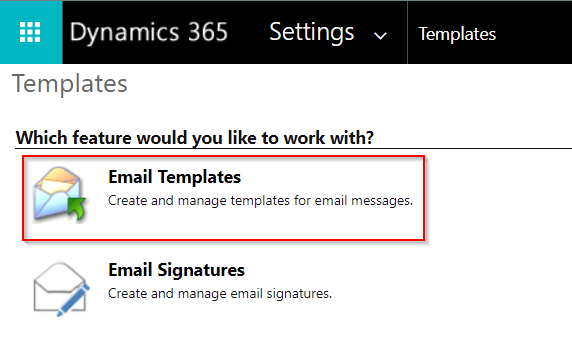
Step 1 – Configure the Email Template
Navigate to Advanced Settings in Power Apps and choose Templates -> Email Templates.
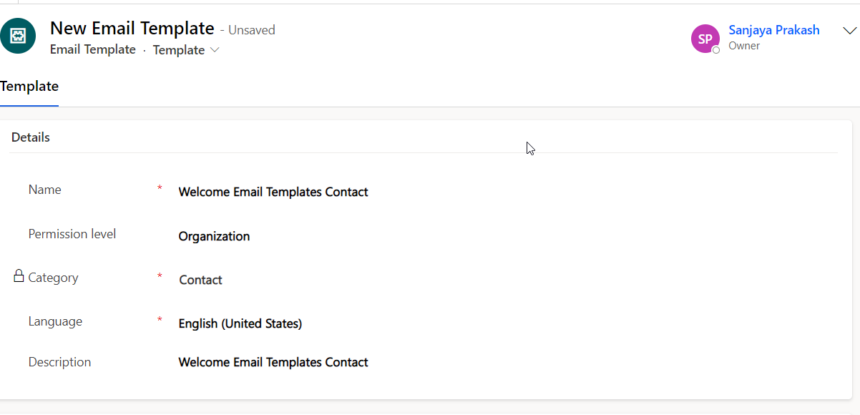
Create New Email Template with Template Type as Contact and Specify Subject and Body using Dynamic content and Images as needed.
Use Template editor section to create the template.
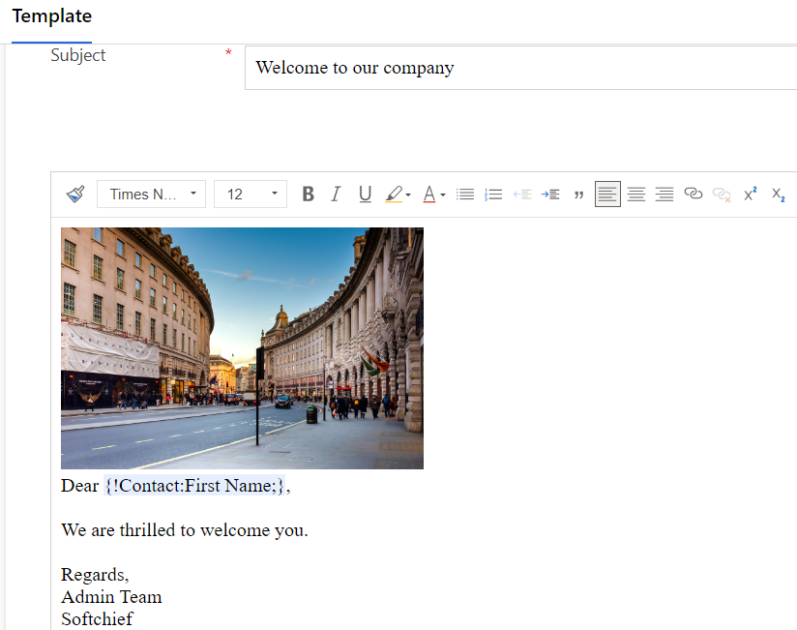
Save the Template once created.
Step 2 – Configure Power Automate to Call Template
Open Power Automate and create a new instant flow. You can create automated flow also. after the trigger add following action steps.
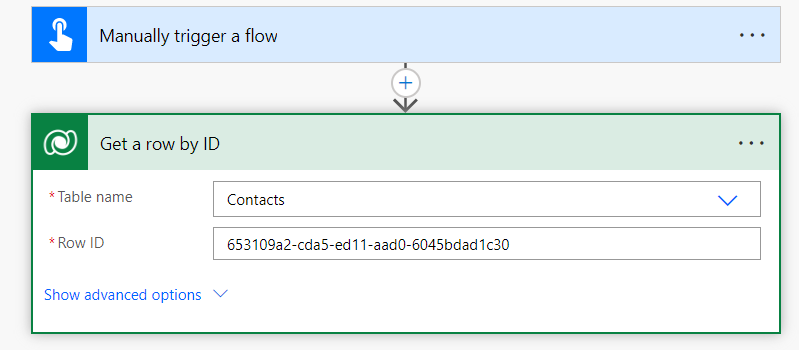
1. Get Row by ID using Dataverse Connection
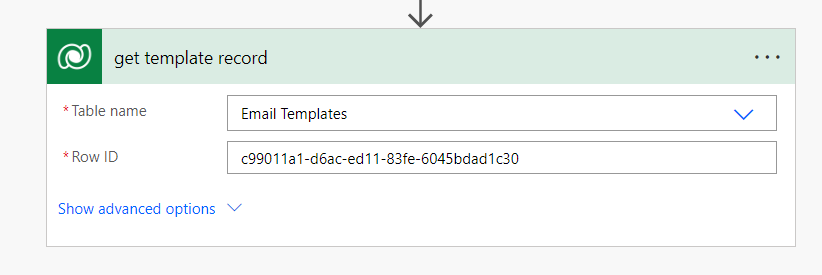
2. Get Template ID from Templates
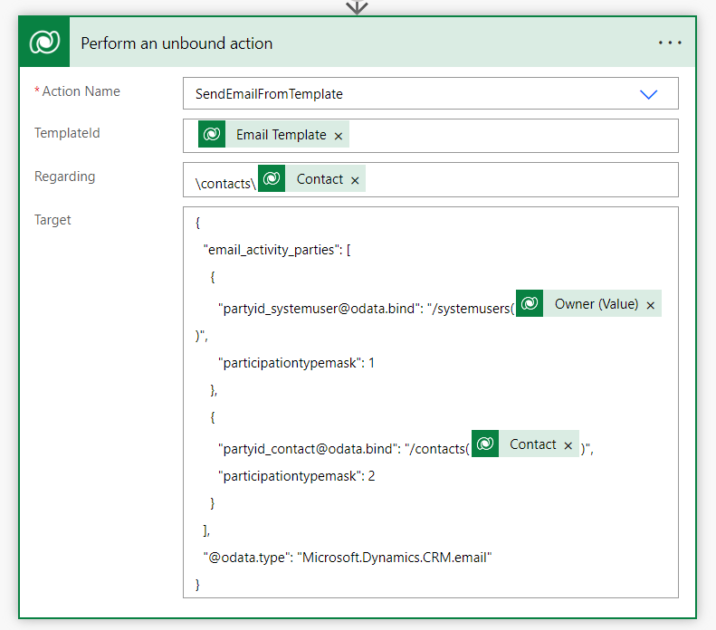
3. Use SendEmailFromTemplate action with Perform UnBound Action
- The TemplateId is the ID of the Email template record.
- Regarding is the record against which the Email activity will be created.
- Target is the JSON object contains the Recipients.
- The JSON object looks like as below.
{
  "email_activity_parties": [
    {
      "partyid_systemuser@odata.bind": "/systemusers(@{outputs('get_template_record')?['body/_ownerid_value']})",
      "participationtypemask": 1
    },
    {
      "partyid_contact@odata.bind": "/contacts(@{outputs('Get_a_row_by_ID')?['body/contactid']})",
      "participationtypemask": 2
    }
  ],
  "@odata.type": "Microsoft.Dynamics.CRM.email"
}
Now the Flow is DONE.
You can save and TEST.
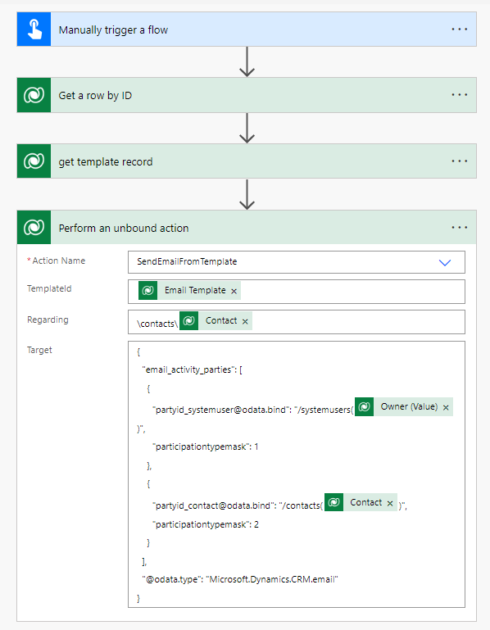
The Entire Flow will look like below. You can make the IDs dynamic as per your business need.
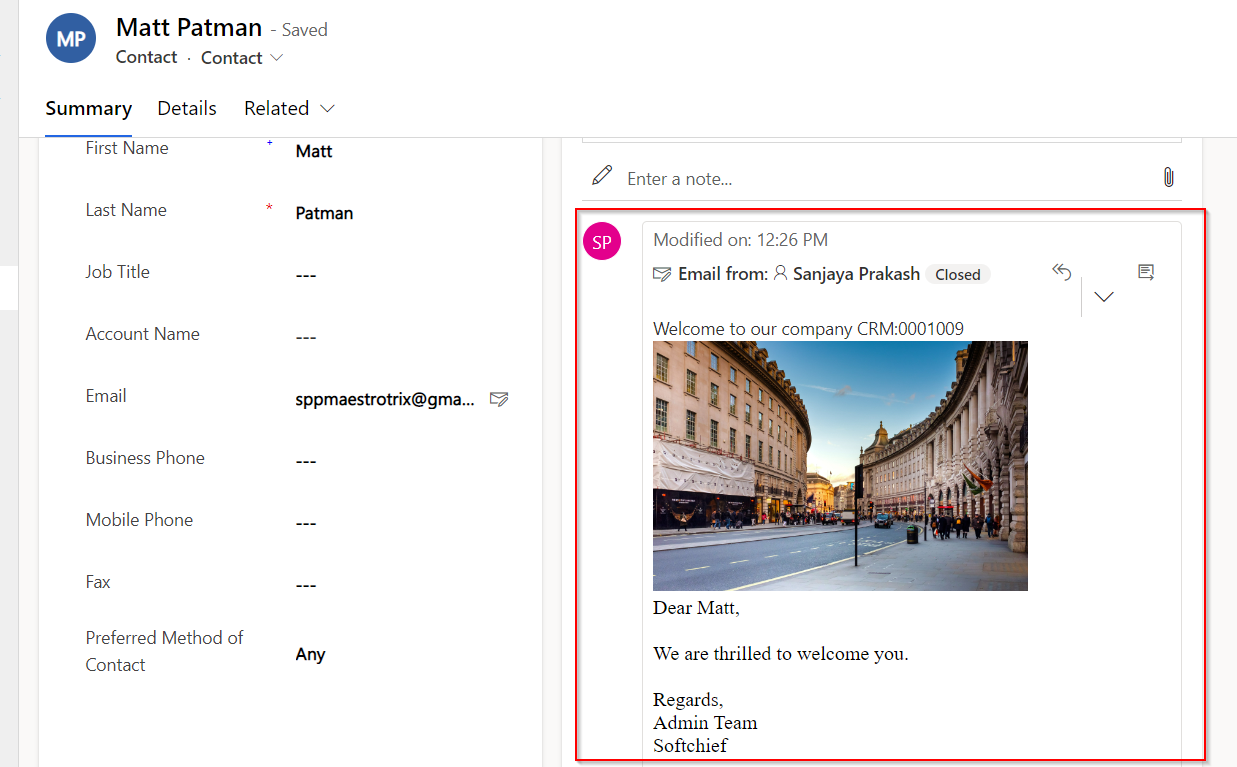
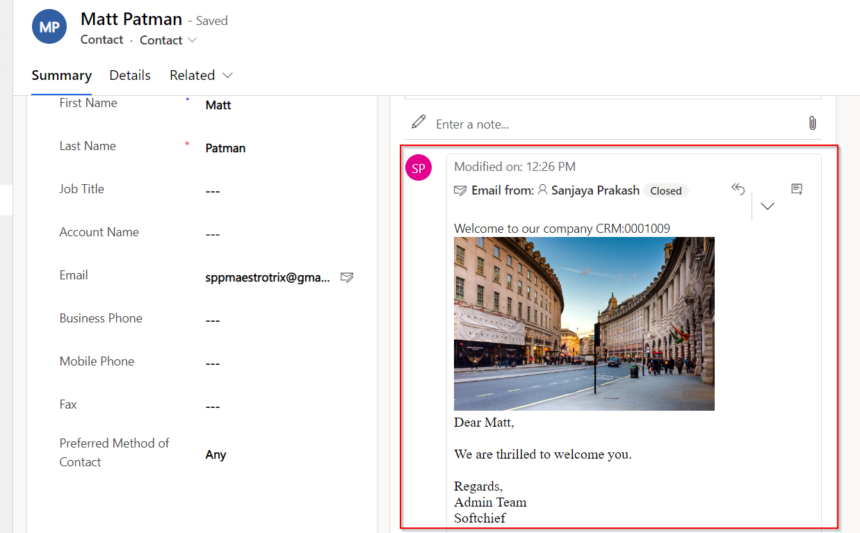
After you test you can see the activity in the Timeline control against the record.
Hope it helps.
For any training requirements connect now.
Follow my blog for more trending topics on Dynamics 365, Azure, C#, Power Portals and Power Platform. For training, Courses and consulting, call to us at +91 832 886 5778 I am working more for community to share skills in Dynamics 365 and Power Platform. Please support me by subscribing my YouTube Channel. My YouTube Channel link is this : https://www.youtube.com/user/sppmaestro