How to add a configuration page for your Power Apps Solution

You can upload a configuration file to note all required configurations for your solution. Follow below steps to do this.
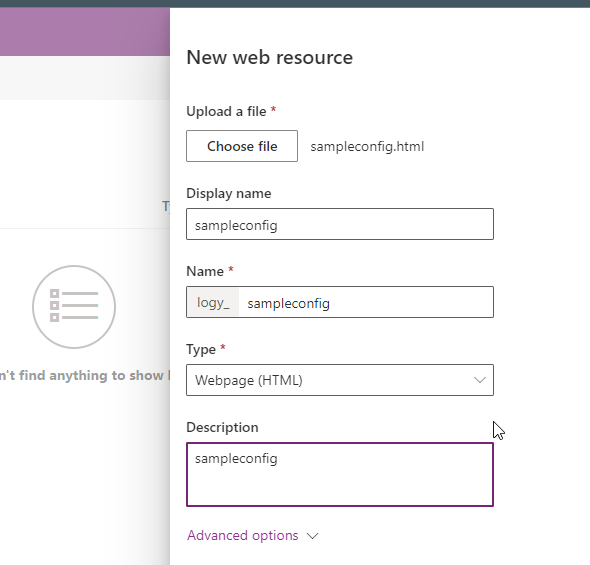
Step 1 – Create a HTML Web Resource
Open your power apps solution and add a new web resource component of Type HTML. Before it prepare a HTML Page and mention detailed Explanation about your configuration. A sample HTML page given below.
<!DOCTYPE html>
<html lang="en">

<head>
    <meta charset="UTF-8">
    <meta name="viewport" content="width=device-width, initial-scale=1.0">
    <title>Software Configuration Manual</title>
    <style>
        body {
            font-family: Arial, sans-serif;
            margin: 20px;
        }

        h1 {
            color: #333;
        }

        h2 {
            color: #555;
        }

        p {
            color: #777;
        }

        code {
            font-family: 'Courier New', monospace;
            background-color: #f4f4f4;
            padding: 2px 4px;
            border: 1px solid #ddd;
        }
    </style>
</head>

<body>

    <header>
        <h1>Software Configuration Manual</h1>
    </header>

    <section>
        <h2>Introduction</h2>
        <p>
            Welcome to the software configuration manual for [Your Software Name]. This guide provides step-by-step instructions on configuring and setting up the software on your system.
        </p>
    </section>

    <section>
        <h2>System Requirements</h2>
        <p>
            Before you begin the installation and configuration process, ensure that your system meets the following requirements:
        </p>
        <ul>
            <li>Operating System: [Supported OS]</li>
            <li>Processor: [Minimum Processor Requirement]</li>
            <li>Memory: [Minimum RAM Requirement]</li>
            <li>Storage: [Minimum Disk Space Requirement]</li>
        </ul>
    </section>

    <section>
        <h2>Installation</h2>
        <ol>
            <li>Download the latest version of [Your Software Name] from the official website.</li>
            <li>Run the installer and follow the on-screen instructions.</li>
            <li>During the installation, you may be prompted to configure certain settings. Ensure that you provide the required information.</li>
            <li>Once the installation is complete, [additional steps if any].</li>
        </ol>
    </section>

    <section>
        <h2>Configuration</h2>
        <p>
            Follow the steps below to configure [Your Software Name] after installation:
        </p>
        <ol>
            <li>Open the [Your Software Name] application.</li>
            <li>Navigate to the settings or configuration menu.</li>
            <li>Modify the necessary configurations, such as [specific configurations].</li>
            <li>Save your changes.</li>
        </ol>
    </section>

    <footer>
        <p>
            For additional support or troubleshooting, refer to the [Your Software Name] support documentation or contact our support team at support@[yourcompany].com.
        </p>
    </footer>

</body>

</html>
Save the Web Resource and Publish It.
Step 2 – Associate HTML Web Resource with Solution
Now In the solution, naviagate to Overview option and Edit details. Click More Options and select the HTML web resource from the dropdown.
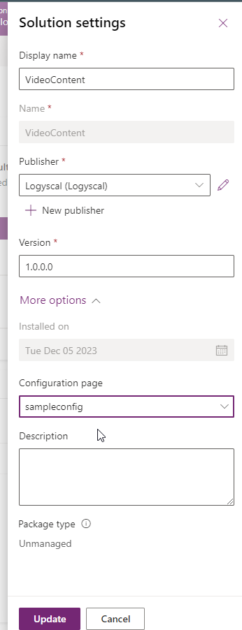
Now click Update.
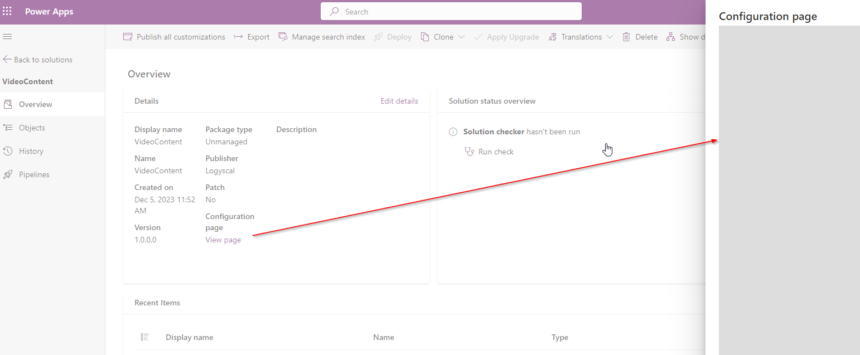
Thats All. You can see the configuration page now for the solution.
hope this helps.