How to hide form fields using Business Rule
Introduction:
In Dynamics 365, creating a user-friendly and streamlined interface is essential for enhancing the efficiency of data entry and management. One powerful tool at your disposal is Business Rules, which allows you to dynamically control the behavior of fields on a form. In this blog post, we will delve into the art of hiding form fields using Business Rules, providing step-by-step guidance and real-world examples.
Understanding Business Rules:
Business Rules in Dynamics 365 are a set of instructions that define the behavior of fields, forms, and business processes. With Business Rules, you can easily create logic without writing code, making it an ideal solution for business analysts and power users.
To learn practical watch the below video or scroll down to read the steps.
Navigate to the Form:
Open the Dynamics 365 app and navigate to the desired entity form where you want to hide fields.
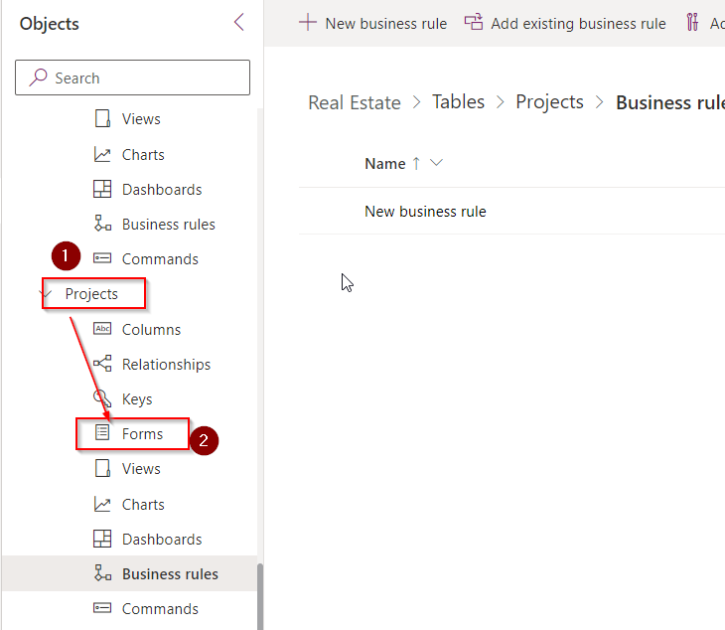
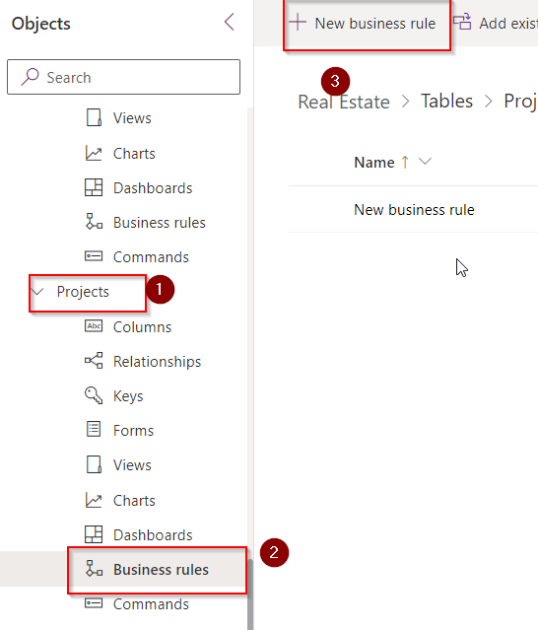
Create a New Business Rule:
- Click on “New” to create a new Business Rule.
- Give it a meaningful name and select the entity scope for the rule.
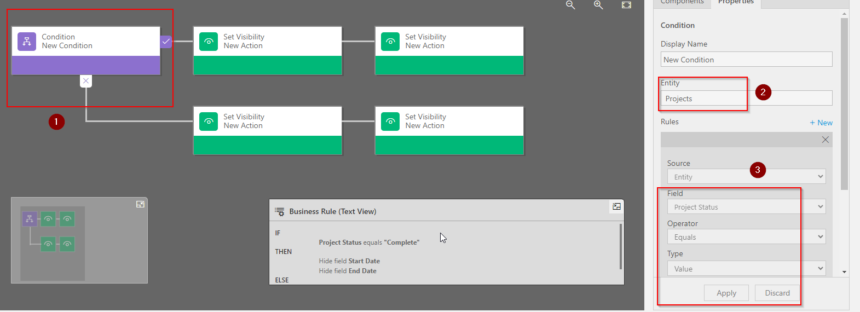
Add Conditions:
- Click on the “Add Condition” button to define the conditions under which the rule should execute.
- Choose the field, operator, and value for your condition.
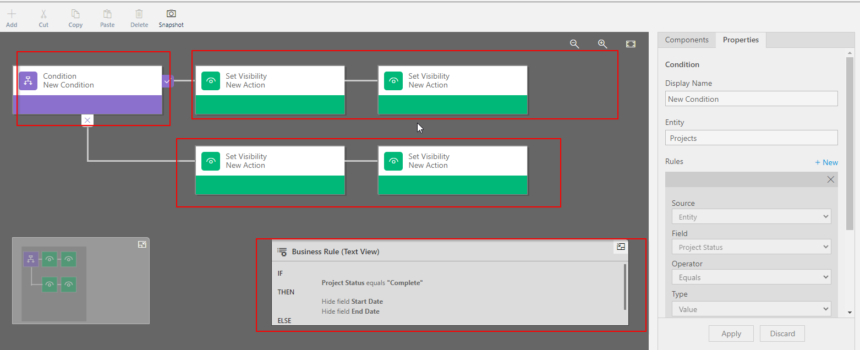
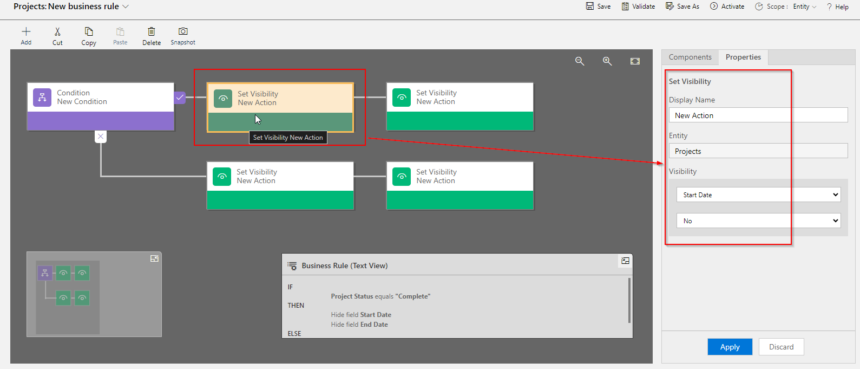
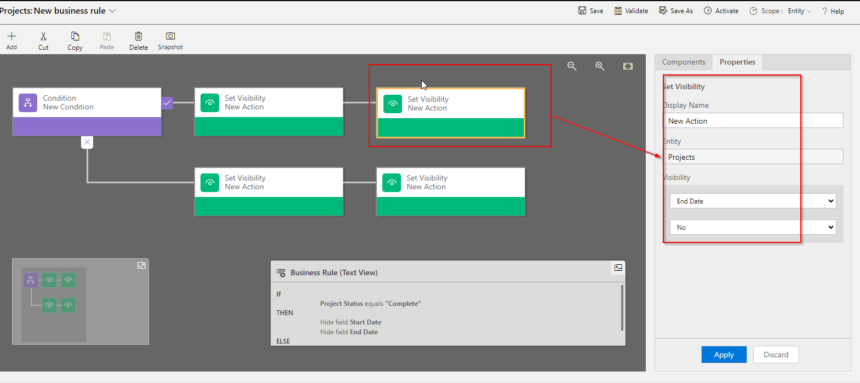
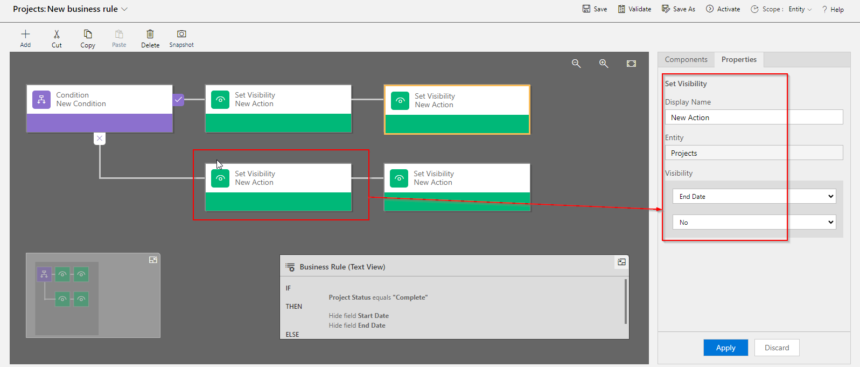
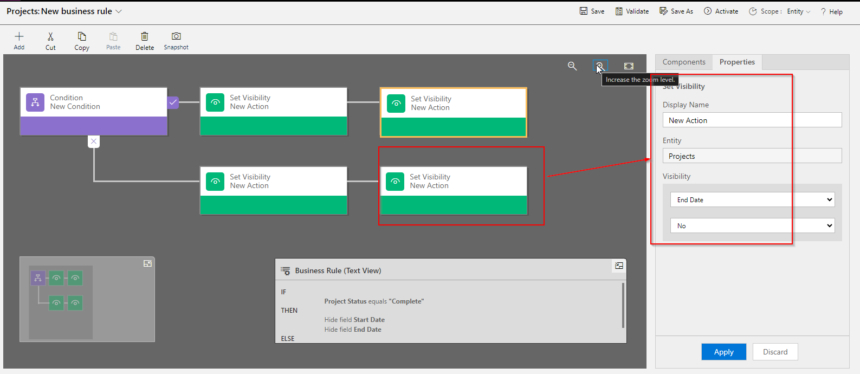
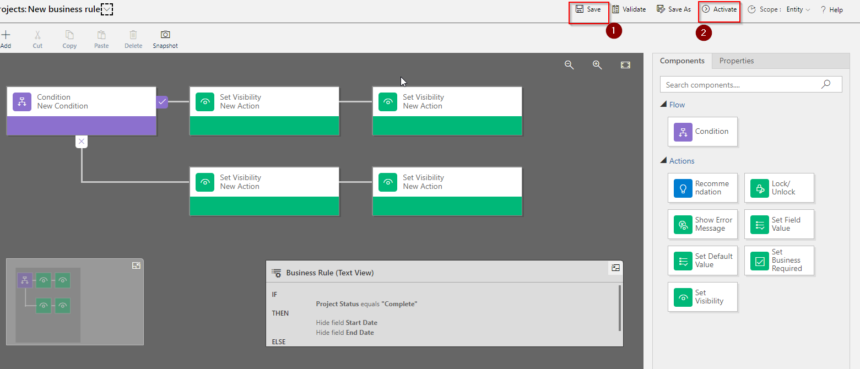
Add Action to Hide Field:
- Once the condition is set, click on the “Add Action” button.
- Select “Set Field Value” as the action type.
- Choose the field you want to hide and set its value to “None.”
Activate the Rule:
Save and activate the Business Rule to apply the changes.
Conclusion:
Hiding form fields using Business Rules in Dynamics 365 empowers users to create a more intuitive and responsive user interface. This capability allows organizations to tailor their CRM systems to specific business processes, ensuring a seamless and efficient user experience. By following the step-by-step guide and real-world example provided, you can harness the power of Business Rules to enhance data entry and streamline your Dynamics 365 forms.
Hope it helps.


